Showing posts with label Italian. Show all posts

Monday, April 29, 2013

Italian Herb Focaccia Bread

I love a good piece of bread with my Italian food.  The local grocery stores can bake up a good loaf, but sometimes I want something a little more.  Something that's versatile and can be used for a number of other dishes.  That's where focaccia bread comes into play

It's a great flatbread with a semi-crispy crust, a soft and chewy inside and embued with all sorts of flavor. Just enough herbage is mixed in to give it a great taste, which is enhanced by the amount of olive oil added into and on top of the bread.  Yes, this is not a low-calorie bread, but it's absolutely delicious.

It's perfect as an accent to any pasta dish, great for wiping sauce off the plate.  But it's absolutely awesome when you stack some salami, pepperoni and a little Italian ham inside. Add a little lettuce, pepperoncinis and a splash of oil and vinegar and you have the perfect Italian sandwich.  I also slice it in half, add some pepperoni and cheese, then place it under the broiler for a few minutes to create a quick pizza for the kids.

It freezes well too, so you can make a full pan, use some for dinner, then slice up the rest into sandwish size portions for lunches over the next week or so.

Italian Herb Focaccia Bread


1 3/4 cups warm water (105 to 110 degrees, take it's temperture to make sure)
1 1/2 packages active dry yeast (a little more than one tablespoon)
1 1/2 tablespoons brown sugar
4 1/2 to 5 cups flour
1 1/2 teaspoon basil
1 teaspoon oregano
2 teaspoons salt
2 different 1/2 cup portions of olive oil
Little more olive oil for coating the pans

1 1/2 teaspoon Italian seasoning
1/2 teaspoon rosemary
Coarse sea salt for topping the bread

Add the water and brown sugar to a bowl and stir.  Then add the yeast and allow it to bloom for about 10 minutes.

While that is happening, add 4 1/2 cups of flour, the basil, oregano and salt to a mixing bowl and mix using the hook attachment for 2 minutes.  Add the first 1/2 of oil to the bread and mix for another minute.

When the yeast wait time is up, add the water to the flour and oil mixture and continue to mix until the bread pulls off the side of the bowl.  Add more flour as you need to.  Once it's pulled off the side, continue to let the hook attachment knead the bread for 6-7 minutes.

Remove the bread dough from the bowl and knead it on the counter for another minute.  Lubricate the insides of the mixing bowl with olive oil and return the bread to the bowl.  Cover and let it rise in a warm place for about 45 minutes.

Grease a large cookie sheet with sides or 1/4 sheet pan with a little more olive oil.  Turn the dough out onto the pan and press it out so it covers the entire pan.  Pour the second portion of olive oil on top and use your hands to spread it all over the top.  Using your fingertips, make the customary dimples all over the surface of the bread.  Sprinkle the Italian seasoning and rosemary over the top of the bread and let it sit in your cool oven for another 45 minutes.

After the second rise, remove the bread and preheat the oven to 425 degrees.   Bake the bread for 25-30 minutes, then remove it from the oven and allow it to cool for 5 minutes before you slice and serve.

Use as a side dish for a meal or the bread for a great sandwich.


Monday, April 22, 2013

Lasagna Rolls

If you're a regular reader of the blog, you know that I could be completely content if marinara sauce was fed to me intravenously.  I'll eat almost any Italian dish and lots of it, thank you very much.  So when I saw this dish at a local restaurant, it intrigued me.  Yes, it's just like the classic Lasagna, but it's a perfect portion rolled up in one noodle.  Not a bad idea at all.

So I've decided to make my own version of it using part of recipes I already have.  We're using a variation Quick and Easy Marinara sauce recipe that we've used in the past, with one extra can of the crushed tomatoes and just a little oregano added for a different flavor.  The fillings are very similar to our other lasagna recipe.  The only difference is that we're rolling instead of layering.

The essential part is getting the noodles to the right consistency.  They need to be soft enough so they are pliable, but not too soft that they start to tear or disintegrate in the pot.  So once your water reaches a boil, back of the heat and maintain a slow boil, not a violent, crazy type of boil that could tear the noodles apart.  We're going to cook 15-16 noodles, but we'll only probably use 12.  We're factoring the distinct probability that one or two noodles will tear or disintegrate in the water.  So consider them sacrifices to the pasta gods...  Better safe than sorry.

Lasagna Rolls

Makes 12 rolls

Sauce
3 14 ounce cans crushed tomatoes
1 6 ounce can tomato paste
1 1/2 tablespoons basil
1 tablespoon oregano
2 cloves garlic, minced


Lasagna Rolls

32 ounces ricotta cheese
1 cup mozarella cheese
1 cup parmesan cheese
1 egg
1 teaspoon salt
1/2 tablespoon basil
1/2 tablespoon oregano
3/4 pound italian sausage
4 ounces sliced pepperoni
15-16 lasagna noodles

In a large saucier or saucepan, brown the Italian sausage and place it in a large bowl for later.  Drain off the excess oil, but set aside to use later.

Heat a large stockpot of water to boiling and add the lasagna noodles.  While they cook for about 10 minutes, so they are pliable but not completely cooked, turn to the sauce.

In that pan you cooked the sausage in, add all of the sauce ingredients and mix well over medium heat.  Once it reaches a boil, reduce the heat so it can simmer while you make the rolls.

In the bowl with the cooked Italian sausage, mix together the cheeses, egg and spices in a large bowl and then allow them to sit while you turn to the noodles.

When the noodles are ready, strain off the water and then shock them with either a spray of cold water or dunk them into a pot of cold water to stop them from cooking any farther.  Lay them on a cooling rack and prepare to assemble.

Lay one noodle out on a cutting sheet or a piece of wax or parchment paper.  Spread a thin layer of cheese and sausage on the roll.  Lay a few pepperoni slices as well, then roll it the noodle up tight.  Set aside for the moment and repeat until the fillings are gone.

Spray a 13x9 inch pan with non-stick spray.  Pour just enough sauce into the pan to coat the bottom as well.  Lay the rolled noodles in the pan, allowing for a little space between each roll.  Once the pan is full, cover the  rolls with the sauce and bake in a 350 degree oven of 30-45 minutes or until the cheese is melting.

Move the rolls to serving plates and ladel a scoop or two of the sauce over each.


Monday, March 18, 2013

Lobster Fettuccine Alfredo on a Budget

I know what you're saying... Lobster on a budget?  Right... whatever Travis.

No wait, it's true!  At least if you have a Costco membership.  They have their seafood events every so often where you can buy great seafood and pretty decent prices.  But even when those aren't happening, they have some great deals, including this...

A 2 pound bag of pre-cooked, flash frozen langoustine lobster tails.  Langoustine lobsters, also known as a Norway lobster, is a smaller cousin of the lobsters we're used to seeing from New England.  They grow to be about 10-11 inches long, so about twice the size of a crawfish.  And the meat is just like their larger brothers, just in bite-size portions.  A large bag like this will set you back $22.00.  And when you consider that there's no waste, unlike when you buy a whole lobster, it's a steal.

What to do with the lobster meat?  There's ALL sorts of different options.  With this bag of langoustine meat, I made a regular batch of Lobster Fettuccine Alfredo, a large batch of Lobster Bisque, and still had enough to make a few Lobster Rolls.  So three meals for four people out of one bag of lobster meat.  Pretty good if I do say so myself.

Couple of tips...  First, if you want to thaw the lobster quickly, place the water you're going to use to cook the noodles over medium low heat when the water's half-way to a boil (around 140 degrees).  Then drop the frozen lobster in the water for about 2 minutes.  They'll come out at just the perfect temperature and any residual goodness that comes off the meat will flavor the water you use to cook the noodles.  Second, heat management on the sauce is vital.  If it gets too hot, the cream and butter will separate and the sauce will get grainy, so only use medium low heat.  You could go to medium, just don't let it boil.  The minute it starts to simmer, drop the heat immediately.  If it does boil, you run the the risk of having an unintentionally chunky alfredo.

Lobster Fettuccine Alfredo


1 pound of fettuccine noodles
6 tablespoons butter
1 cup whipping or heavy cream
1 teaspoon freshly ground pepper
1 cup grated Parmesan cheese
12 ounces of cooked lobster meat
2 cloves garlic, chopped fine

If you're using live lobster (somewhere in the two and a half pound range for 12 ounces of meat), boil the crustacean in a large stockpot of water and let him simmer in there for 10-12 minutes.  Remove the lobster, extract the meat and set aside.  Save the boiling liquid for the noodles.  It'll add a little more lobster flavor into the meat.   If you're using pre-cooked lobster meat, ignore this step.

Bring a large stockpot of water to boil and add the fettuccine.  Allow the noodles to soak for 10-12 minutes until they are al dente.

While that is cooking, place a large saucier or frying pan over medium-low heat.  Add the butter to the saucepan and allow it to melt completely.  Add the cream and pepper to the butter and whisk to combine.  After about 5 minutes of occasional stirring over medium-low to medium, add the Parmesan cheese and garlic and stir until the cheese melts into the sauce.  Finally, add the lobster bits and cook for two minutes more.

Drain the fettuccine noodles and divvy out portions on places.  Spoon the sauce out onto the noodles, making sure everyone gets a good amount of lobster meat.  Serve immediately.

Monday, August 20, 2012

Zucchini... or Eggplant Parmesan

Normally, I have a rather large garden in the backyard.  We'll harvest all sorts of squash for grilling, small cucumbers for homemade kosher dill pickles, fresh beans for some great side dishes, and a bunch of different fresh herbs for the spaghetti sauces.   This year, well, the garden crashed and burned.  More like "consumed and burned" thanks to the combination of a vole infestation from the neighboring construction lots and a very hot summer that scorched anything green.  Even my lawn is suffering.

Luckily, it's also the time of year where canoe sized zucchinis start anonymously showing up on our doorstep like Dickensian orphans.  Just the other day, my parents dropped off a 15 inch monster of a zucchini.  Now, we all have a great zucchini bread recipe.  And I've tried all sorts of grilling and deep frying variations.  Few things are quite as good as a fried zucchini stick dipped in a homemade ranch dressing.

But I was cooking up a batch of spaghetti that night and thought, "why not make a version of Eggplant Parmesan, but use the zucchini instead?"  This zucchini was almost as fat as an average eggplant.  The meat inside both are rather firm.  And if I broke out my mandolin, I could slice them to that uniform width to make them fry evenly.   This worked just perfectly.  The flavorful and slightly salty Parmesan coating worked extremely well with the tender and moist zucchini to make the perfect main course.

And this dish is even a vegetarian dish!  Yes, the lifelong carnivore has created a veggie meal.  Yes, it's not vegan because of the milk and egg wash, don't send me letters.  But it is a great substitution for meat.  You won't miss it when these medallions are drizzled with the marinara sauce.

One tool I would highly recommend you purchase to make this and a number of other dishes easier to prepare is a mandoline.  Not the instrument, the kitchen tool.  This is a plane with different blades that are either be inserted or adjusted within it tool.  You slide your food down the plane and the blade cuts them to identical, uniform widths.  Some have julienne blades as well, so you can produce perfect little strips of carrots for egg rolls, potato lengths for the perfect french fries or tomato, radish or cucumber bits for your favorite salad.  Yes, you could spend $100's of dollars for one, but you DO NOT need to.  I bought a Sharper Image brand mandoline at Bed Bath and Beyond for all of $20.  It does 1/8, 1/4, and 3/8 slices, and 1/8 or 3/8 juliennes.  For most of your basic recipes, that's all you'll ever need.  If you are looking for something a little fancier, you can find a number of other mandolines that are both very functional and economically viable in my Amazon Store.

One last bit of advice when using a mandoline... use the hand guard whenever possible.  It's there for a reason.  The blade in the mandolin are VERY sharp so it can cut through anything, including your fingertips.  I cut my hand preparing food for the first time in a decade because I thought, "Hey, I can freehand this so I can get that last little slice of potato."  Yeah.. not a good idea to freehand...  I freed a little part of my fingertip from my hand in the process.  So when you're using a mandoline, do one of two things.  Either use the hand guard that's supplied with the mandoline, or spend $10 for a Kevlar cooking glove.  It's Kevlar weave protects your hand from an errant slice while dicing vegetables, or from your own stupidity if you decide to freehand on a mandoline.

Zucchini... or Eggplant Parmesan


One batch of the Quick and Easy Marinara sauce
2 large zucchinis or eggplants, enough to produce 20-24 rounds
4 eggs
1 cup milk
1 1/2 cups bread crumbs
1 tablespoon basil
1 tablespoon oregano
1 teaspoon garlic powder
1 cup grated Parmesan cheese
1/2 teaspoon salt
Light or extra virgin olive oil, your choice


Mix up your marinara sauce and let it simmer while you work on the rest of the dish.

If you're using eggplant, peel off the outer skin.  With Zucchini, you can leave the skin on.  Slice the veggies into 3/8 inch rounds.  Mix the eggs and milk together in a bowl.  Pour the bread crumbs and all the spices into a large ziploc bag.

Dip the slices into the egg wash and then drop it into the bread crumbs and shake to coat.  Dip it back into the egg wash and back into the breadcrumbs for a second coating.  Lay the dipped slices on a cookie cooling rack while you coat the rest.

Place a large skillet over medium high heat and pour just enough olive oil into the pan to cover the bottom.  When the oil has heated up to around 300-325 degrees (should only take 2-3 minutes), place the rounds into the oil and allow them to brown for 1 1/2-2 minutes on one side.  Then flip them over and cook them for another 1 1/2-2 minutes.  Remove them from the oil and allow them to rest on another cooling rack with paper towels beneath to catch the excess oil.  Add a little more oil back into pan so the bottom is barely covered and bring the oil up to the proper heat again.  Repeat until all the rounds are fried.  Serve beside or on top of your favorite pasta with marinara sauce and grated Parmesan cheese on top.

So the next time a zucchini boat is delivered to your front door, turn it into a delicious Italian meal for the entire family.

Wednesday, August 8, 2012

Riesling Italian Chicken Breasts

There are very few things as satisfying than a slightly chilled glass of wine after a VERY long day.   Be it hours in the garden, dealing with that one co-worker that everyone wonders when they are going to fire, or just chasing three kids with an unlimited amount of energy, that glass can help all the stress melt away.  Liz and I have our favorite wine, the Chateau Ste Michele Riesling.  It's a perfect blend of sweetness and dryness, with all sorts of body.  Don't ask me about the undertones or hints of other flavors.  I may have an adventurous palette, but it's not that pretentious.  I  just know we love the taste of it and the way it makes the two of us feel afterwards, if you know what I mean.  Wink, wink, nudge, nudge, say no more...

What I love to do is to sacrifice one glass worth of this nectar of the gods and cook with it.  The cardinal rule of cooking with wine: If you wouldn't drink it, don't cook with it.  So instead of using that awful "cooking" wine from the store, use some good stuff.  Don't use that "It's a lot cheaper" excuse with me!  Let's price-check.  A bottle of "cooking" wine is around $4.29 for 12 ounces. A 24 ounce bottle of the Chateau Ste Michele Riesling is $8.99 in Utah, the state with the highest alcohol tax in the nation.  So when you compare equal amounts of wine, the difference is 40 cents.  You still want the "cooking" wine?  Go ahead, I DARE you to drink a full glass the cooking wine.  Just pick up a bottle of the good stuff instead.

I like how this wine tastes with a lighter meat, like chicken breasts, especially during the summer on the barbecue.  But here's the problem with chicken breasts on the barbecue.  They tend to dry out... quickly.  There's a ton of dry high heat in there and breasts can shrivel like a worm on an August Arizona sidewalk.  So we need to push as much liquid into the meat as we can to maintain its moisture.  The best way I've found to do it is to do a brine/marinade.  We've brined our Thanksgiving turkey and we've marinaded lots of things from flank steak to fajitas.  In this case, we're creating a soaking material that's a marriage of the two techniques and adding all sorts of additional flavors as well.

I'm a sucker for the Italian flavors, so this recipe uses some classic Italian herbs and a light olive oil. An alcoholic beverage marinade works well when some oil is mixed in.  My philosophy on why it works is that every flavor breaks down and is enhanced when they are soaked in one of three liquids; water, fat or alcohol.  Therefore, since we have all three here when we use wine and a light olive oil, everything gets a boost.  Also, I'm adding some extra salt into the mix.  Why?  Well, we want the marinade to act like a brine and force the meat to soak up more liquid.  Think back to your science class... remember Osmosis? 

Osmosis is "the net movement of solvent molecules through a partially permeable membrane into a region of higher solute concentration, in order to equalize the solute concentrations on the two sides."  In other words, if you soak meat in a salt water solution, it will naturally soak that salt water through the outer wall into the meat and into the tissue (along with the other flavors too).  That way, when you cook the breasts, they'll only lose the excess water you've forced into it.  The natural moisture will stay inside and keep them nice and juicy.

Riesling Italian Chicken Breasts


Serves 4-6, 1 breast for each person

4-6 boneless skinless chicken breasts
1 cup Riesling wine
1/4 cup olive oil (your choice of type)
2 teaspoons basil
1 teaspoon oregano
2 garlic cloves, crushed
1/4 red pepper flakes
1/2 teaspoon salt

Combine the wine, oil, basil, oregano, garlic, salt and red pepper flakes into a gallon ziploc bag.  Seal and shake or squish the bag to mix the ingredients.  Reopen the bag and add the chicken.  Seal again and squish the chicken around, making sure each breast is coated with the marinade.  Place the bag into another ziploc bag or a baking dish and place back in the fridge for at least 4 hours, all day or even overnight is better.

When ready, fire up the grill to medium heat.  If you don't have a barbecue, a large skillet over medium heat will work all right.  Add the chicken and cook until the internal temperature reading on your digital thermometer reaches 165 degrees. Allow the breasts to rest for 5 minutes before serving.  I suggest slicing them widthwise and fanning the pieces out over rice or linguine pasta.

Wednesday, March 28, 2012

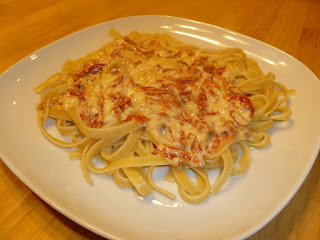
Sundried Tomato Cream Sauce

So here's a completely experimental recipe.  Liz and I went to an Italian restaurant a while ago and I ordered sausage ravioli that came with a sundried tomato sauce.  Although I could have red sauces fed to me intravenously and be happy for life, every so often I'll crave a cream sauce.   It was delicious!  It had a combination of sweet and chewiness from the tomatoes, but yet smooth, rich and slightly salty from the cream and different types of cheeses.

So I've made a few attempts at recreating it at home.  It's a lot like the Alfredo sauce, but I've reduced the amount of butter.  Adding that much fat to an item that is packed in oil turns out to be a greasy mess.  Oil-packed sundried tomatoes will release some of the oil they've retained when they are cooked, so it's best to trim some fat.

The basic recipe below has a pair of basic cheeses, Parmesan and mozzarella, ones that you may have around the house already.  If you want to swap them out with others you may like better, do it.  For example, provolone and asiago would work great.

Sundried Tomato Cream Sauce

Makes 4 servings
1 cup heavy cream
1 tablespoon butter
1/4 cup sundried tomatoes, with any excess oil removed
2 cloves garlic, finely minced
1/4 cup grated mozzarella cheese (substitute Asiago cheese if you have it for more flavor)
1/4 cup grated Parmesan cheese
3 or 4 grinds of fresh black pepper

In a skillet or saucepan, add the cream and butter and cook over medium heat.  Maintain a simmer for about 6-7 minutes. 

While you're waiting on the simmer, measure out your sundried tomatoes and strain off any oil.  Place them between a pair of paper towels and soak out any remaining excess oil

Add the tomatoes garlic and simmer for another 3-4 minutes to give the tomatoes to give up some color and flavor to the sauce.  Add the cheeses and stir until they're incorporated into the cream.  Grind your pepper on top and stir to combine.

Serve quickly over any type of pasta you'd like.  I've found linguine and fettucini work great.

So make a batch for dinner and feel free to experiment with the different types of cheese.  Find a combination you like and go with it!

Monday, March 26, 2012

Lasagna: any way you want it, that's the way you need it...

We're three weeks in to having the new baby and let's just say we're candidates for sleep deprivation studies.  Yes, I knew this was coming, I've lived through this before.  But the stark reality of waking up every hour or two every night for weeks starts wearing on the soul.

And while I love to cook, when I'm absolutely worn out, I don't want to work in the kitchen for any extended period of time.  I want to sit in the La-z-boy and enter that semi-catatonic zombie state in front of the big screen and hope that my lack of movement will recharge the batteries.

But nevertheless, Mommy, the other boys and I all have to eat.  So we planned ahead.  We stocked up on hamburgers and chicken breasts so on those warm days, I can let the grill do my work for me while I watch the other kids tire themselves out on the swings.  I have some quickie meals in a box (mac and cheese) and sandwich fixings so a meal can be assembled quickly.

But most importantly, we pre-made a few great meals weeks ago and froze them.   I've got pans of enchiladas in the freezer. We made bags of tamales that can be extracted at a moment's notice.  And best of all, we made a couple small lasagnas.

Continuing with this month's red sauce theme, we're building your basic lasagna.  The great thing about lasagna recipes is that every one is a suggestion.  Yes, you can follow the recipe to the letter, but lasagna is so customizable, you can put anything in it you want.  The only standards are that you use noodles, some sort of cheese mixture and some sauce. You're not even bound to red sauce.  I've seen alfredo and pesto sauces used in lasagna, but in this particular one, we'll do red.

When I make a lasagna, I like to include a combination of meat and vegetables.  It just brings a great combination of flavors to the table, but if you're a meat and noodle type of person, go carnivorous.  I have found that firmer vegetables, like onions, peppers, eggplant and zucchini should be slightly sauteed before adding them to the dish, just so they are nice and tender at the end.  I'll use a combination of cheeses: ricotta for its adhesive qualities, mozzarella for its stretchiness, and paremsan for its flavor.  But if you want to mix in some asiago, provolone, etc., do it.  My only recommendation is to keep the ricotta, because it makes the mixture of cheeses much easier to spread.

Now the dish you see in the picture above is in a 13x9 dish, because we were feeding a number of people.  If you're making these to freeze for a family of four, you can build them in a pair of 8x8's or any other casserole dishes and drop them into the deep freeze.  An 8x8 pan is more than enough to feed four, so you get two nights of meals out of one recipe.

Lasagna


Feeds 8

1 box lasagna noodles
2 teaspoons salt

Sauce
5 14 ounce cans of crushed tomatoes
3 tablespoons dried basil
3 cloves of garlic, minced.

Cheese filling
32 ounces ricotta cheese
1 cup parmesan cheese
16 ounces mozzarella cheese
1 teaspoon garlic powder
1 tablespoon dried basil

Topping
4 ounces parmesan cheese
6 ounces mozzarella cheese
Basil
Parsley

Other Fillings (use whatever combination you'd like)
1 pound browned italian sausage
1 pound brond ground beef
5 ounces sliced pepperoni
2 cups sliced mushrooms, slightly sauteed
2 cups sliced zucchini
2 cups sliced eggplant
1 cup sauteed onions

Prep any of the Other Filling items so they will be ready for assembly.  Brown the meat, slice the vegetables, etc.

Onto the sauce and noodles... Place a large stockpot of water over high heat and bring to a boil.  While waiting for the boil, in another large saute pan or stockpot, combine the sauce ingredients and allow them to simmer.  Add the noodles to the water along with about 2 teaspoons of salt.  Cook them until just short of done, then remove, strain and spray with cold water.  Lay the noodles on cookie cooling racks.

Create your cheese filling by combining all of the ingredients and thoroughly mixing them with a large spoon or your clean hands.  Then gather all of your ingredients close and easily accessible so you can start building the layers.

Grab your casserole dishes and liberally rub with olive oil/spray with non-stick spray.  Pour enough sauce into the pan to thinly cover the bottom.  Then lay down a layer of noodles horizonatlly across the pan.  From here, you can start layering all of the ingredients any way you'd like.  I'd suggest using a layer of cheese and meat, a layer of veggies, a layer of sauce, and then a layer of noodles vertically across the pan.  Changing the direction of the noodles will create stability when you slice it up later.  From there, add another cheese/meat/veggie/sauce combo and then another layer of noodles horizontally.  This pattern is not set in stone.  If you want to do a layer of just meat and cheese and then another layer of veggies and cheese by all means, do it.  Just make sure to change the direction of the noodles each time and use your sauce.

When your pan is full, finish with a top layer of noodles and cover it with the remaining sauce.  Then sprinkle all of the toppings (parmesan, mozzarella, basil and parsley) over the top for decoration and color.

Cook in a 350 degree oven for 30-35 minutes covered in tin foil.  When the oven beeps, remove the tin foil  and cook for another 10-15 minutes until the cheese on top is golden brown.

Extract from the over and let it sit for 10 minutes.   If you slice it right out of the oven, it'll fall apart.  Giving it time to rest will allow the cheese and sauce to solidify and bind the layers together.

If you want to freeze it for a week or two down the road, cover it in plastic wrap and tin foil and do not place it in the oven.  Instead place it in the freezer, where it should stay good for 1-2 months.  Pull it out and place it in a 350 oven for 70-90 minutes when you're ready to eat it.  You'll know it's done when a thermometer placed into the center of the lasagna reads 140 degrees.

So make a pair of these, one to eat now and one to freeze.  That way, you can have a great dinner on a night you just don't have the energy to cook.  Anybody wanna tend a 3 week old for a couple hours so daddy can get a nap?


Wednesday, March 21, 2012

Italian Meatballs

If you've been to some of the family size Italian restaurants, you've seen the monstrosities that the meatball has become.  One time we ordered meatballs and were served ones that were larger that softballs.  Technically, there were two, so that qualified as "Meatballs" (plural).  But seriously, do they really need to be that large?

The problems you have with something that big is that you need to cook it for a VERY long time.  In essence, you're making a circular meatloaf. For most of us, you don't have an extra 60 minutes to make those at home.  And when a meatball is that large, you have to cut it up just to consume it.  The ones we had started falling into crumbles when we dissected it, so our spaghetti and meatballs turned into spaghetti with meatbits.

Meatballs should maintain their consistancy when you cut them up.  A good little meatball, about the size of a  golf ball, should slice perfectly down the center.  The bread and egg inside should maintain it's cohesion.  And you can put two or three on a little kid's plate and they can play with them while they eat.

Making them at home is not scary.   Matter of fact, it's pretty darn easy.  The assembly of the meatballs will only take as long as it would to brown the meat to add to a sauce.  If you shape and form the balls, then pop them in the oven , they'll cook in the time it takes you to cook your pasta and make your quick and easy marinara sauce.

There are a few different ways to prepare them.  Baking keeps them out of the cooking area until everything else is done and they will be juicy if not overcooked.  Pan-frying will give them a nice crust.  And a long marinara soak (if you have time) will infuse the flavors into the sauce.  All are delicious, so experiment with each to find what you like best.

Italian Meatballs


Makes 20-25 meatballs

1/2 pound ground pork
1/2 pound ground beef
1/4 pound Italian sausage
1/4 cup bread crumbs
1 egg
1/2 teaspoon parsley
1 1/2 teaspoons basil
1/4 red pepper flakes
2 cloves garlic, minced fine
3 grinds of black pepper from a pepper grinder
Another 1/4 cup bread crumbs (depending on the cooking method)

Combine the pork, beef, sausage, egg, parsley, basil, pepper flakes, garlic, black pepper and 1/4 cup bread crumbs in a large bowl.  Stir with a spoon for a minute to combine, but then switch to your hands and mash it all together.  Now pull off a small portions of the meat and roll it between your hands to make balls just smaller than golf balls. Set them on a plate and decide upon a cooking method.

Baking:  Roll each of balls in the additional 1/4 cup bread crumbs to create a thin outer coating.  Place them on a cookie sheet and bake in a 350 degree oven for 20 minutes or until the internal temperature of the largest meatball reaches 155 degrees.  When you extract them from the oven, cut one open to make sure that they are cooked all the way through.

Pan frying:  Roll each of balls in the additional 1/4 cup bread crumbs to create a thin outer coating.  Place enough olive oil in a large saute pan or skillet to come 1/2 inch up the side.  Set the meatballs in the pan allow them to cook on each side for 4 minutes or just before they burn

Marinara soaking:  Place a skillet over medium high heat.  Place as many meatballs as will comfortably fit into the heated pan and sear all sides of the meatballs.  Move directly to a pan of simmering marinara sauce and allow them to cook, submerged in the sauce, for 20 minutes.

Serve them over pasta, in a hoagie roll covered in red sauce and lots of cheese, or just by themselves.

So avoid the gargantuan balls of doom and make your own meatball batch at home.

Monday, March 19, 2012

Portabello Mushroom and Cheese Stuffed Shells

The great part about a good red sauce is that it doesn't have to be the star of the dish, it can be an accent.  Sure, I love spaghetti drenched in either a basic marinara or a chunky meat sauce. I truly could drink it straight.  But sometimes, it's good to let a number of the other flavors shine through.

A great example of this is stuffed shells.  These little pasta pockets by themselves taste like any other noodle.  But it's the combinations you create inside makes all the difference.

Now you can add all sorts of items inside the shells. I plan to attempt a much more meaty option in the future featuring Italian sausage, pancetta and prosciutto.  But for this instance, we're going to create a version with just mushrooms, cheese and a single slice of pepperoni.

Whenever you are stuffing something with cheese, I recommend you use multiple types of cheese.  Sure, you may love mozzarella, but by itself, it'll melt all over the place.  Ricotta by itself my set up well, but the flavor is pretty bland.  Think of mixing cheeses like music.  A single note can be nice, but a full chord with complimentary tones is much more enjoyable.

Combining them all gives you all the positive properties and a ton of flavor.  So we're going to use ricotta for it's congealing properties, mozzarella for it's stretchiness and taste, and a whole mess of others for flavor.  Yes, you could go to the local cheese monger and buy minuscule amounts of asiago, provolone, etc.  But none of us have the time and few have the money or patience to do that. So go to the deli section of your grocery store and look for a prepackaged blend of Italian cheese.  Make sure you read the label to see what cheeses are included.  One brand out there claims that mozzarella and Parmesan is a good mixture.  WRONG!  That's like saying you know every region of Italy because your cruise ship docked outside of Rome for a day.  Make sure the bag you use has a multitudes of cheese, like asiago, etc., so you have a number of flavors.

Now back to the sauce... the recipe does call for 2 quarts of sauce.  We'll drench the shells in the sauce to help keep them moist during the baking process, but you don't have to or want to necessarily smother the shells in the sauce when you serve them.  As you can see in the picture above, a small amount of the sauce will naturally stick to the shells.  And overpowering the shells with the sauce will bury the flavors of the cheeses and mushrooms.  By all means, use as much as you want when you serve, but I'd suggest just a spoonful or two on top of each as a delicious accent.

This recipe makes a LOT, 24 to 30 shells.  And when you consider 3-4 is a meal, then this becomes a perfect freezer stocker meal.  Cook the large pan so you'll have a great dinner and a wonderful lunch the next day, then wrap the smaller pan in plastic wrap and tin foil and drop it in your freezer for a cooking free night somewhere in the future.

Portabello Mushroom and Cheese Stuffed Pasta Shells


Makes 24-30 shells

1 box of jumbo pasta shells
64 ounces of marinara sauce (storebought if you must, or a double batch of my Quick and Easy Marinara or one batch of my Chunky Marinana)
2 large portabello mushroom caps or 6-7 baby portabellos
1 32 ounce container ricotta cheese
2 cups mozzarella cheese
1 cup of Italian style cheeses (parmesan, asiago or any other mix you like)
1 tablespoon basil
1 teaspoon fresh black pepper
1 teaspoon Italian seasoning
30 small slices of pepperoni

Slice the portabello mushrooms into small bits and then saute them over medium high heat.  Remove them just before you think they are done and place them in a large mixing bowl.  Begin heating a large stock pot of water mixed with about a tablespoon of salt.  As you wait for the water to come to a boil, make your marinara sauce and allow it to simmer as you complete the rest of the steps.  When the water is boiling, add the shells to the water and cook as recommended on the box.  Strain the noodles when ready and spray them with cold water to stop the cooking process.  Lay them out on a cooling rack to cool while you work on the filling.

Grab that bowl with the sauted mushrooms in them and add the ricotta, mozzarella and Italian cheeses.  Stir them all together using a large spoon.  Sprinkle the basil, pepper and Italian seasoning over the cheese and mix until combined. 

Pull a 13x9 pan AND an 8x8 or smaller pan out of your cupboards.  Spray both with non-stick spray and pour a thin layer of sauce in the bottoms.

Now to stuff the shells...  Heat your oven to 350 degrees.  Grab one shell and lay a slice of pepperoni inside.  Using a larger of the two spoons in your silverware drawers, scoop out enough of the portabello and mushroom mixture to fill the shell.  Place the shell in one of the pans an repeat until all are filled.  Once the rest are completed, cover the shells with the remaining sauce.

If you want to cook all of them, cover both with tin foil and place in the oven for 35 minutes or until the internal temperature of the shells reach 140 degrees.  If you want to save one pan for later, cover the pan with plastic wrap, tin foil or the pan's lid and place into the freezer for up to 2 months.  When you cook it later, move it from freezer to a 350 degree oven and cook for 60-65 minutes or until it reaches 140 inside the shells.

Serve quickly so the cheese is still melty.  When serving, sprinkle additional mozzarella or Italian cheese over the top of the shells. 

So make a large batch of shells, maybe freeze a few for a quick meal later and then stuff yourself.


Monday, March 12, 2012

Pasta Alla Arribbiata

Regular readers know the type of heat freak I am.  Yes, I can endure almost any type of heat.  Send me to a heat related eating challenge and I'll destroy it.  I may demolish my nasal cavities and sight for a few days, but it's a sacrifice I'm willing to make.

There are times when some heat is welcome, but too much can destroy the taste.  And I've found that Italian food is that way.  Too much heat destroys the taste of the tomatoes and since I could be fed marinara interveniously, I never want to lose that flavor.  For me, the happy medium is a good Pasta alla Arribiata.  Translated, it means Angry Sauce.  And depending on how much pepper you add to the dish, it can be downright furious.  This version, however is spicy and flavorful, but not enough that the average person will be begging for dairy products. 

I like to add some italian sausage to the recipe, so there's a little protein and I can serve it as a main course.  But this can also be a side dish for another entree, such as a Chicken Parmesan, Chicken Marsala, or an Italian Beef.  One other accent can be some chopped pepperoncini peppers added when you add the other spices.  It'll bring some more heat to the party, so adjust your red pepper amount accordingly, but it will add some additional acidity and accent the tomatos extremely well.


Pasta Alla Arribbiata


Serves 4 as a main course, 8 as a side dish

1 pound of your favorite pasta (I prefer penne, rotini or linguine for this recipe)
2 tablespoons salt
1 tablespoon olive oil
1/2 small or meduim onion, chopped fine
2/3 cups mushrooms
1/2 pound hot italian sausage (optional)
2 cloves minced garlic
1 28 oz can crushed tomatoes
1 6.5 oz can tomato paste
1 1/2 tablespoons basil
1 teaspoon oregano
1 teaspoon crushed red pepper.

Put a large pot of water on the stove and crank it to high. Add the salt to the water.

While waiting for the water to boil, in a large high-sided saute pan or large skillet over medium heat, add the oil.  After giving it a minute or two to get hot, add the onions and mishrooms.  Saute them until the onions become translucent.  If using sausage, add it at this point and brown thoroughly.  Add the garlic as well.  Once the sausage is browned, add the crushed tomatoes and tomato paste. 

The water should be boiling.  So add the pasta so it can cook while you complete the sauce.  Crank the heat to medium high and add the basil, oregano, and red pepper.  Stir periodically to prevent small tomato volcano explosions.  When the bubbling gets too dramatic for your taste, drop the heat to medium-low.

When the noodles are finished cooking, strain them.  Serve the pasta with a large scoop of sauce poured over the top and garnish with some grated parmesan and basil.

So make some today and enjoy a little heat with your Italian food.

Wednesday, March 7, 2012

Baked Ziti and Growing Your Own Basil

Sometimes you want something more than spaghetti.  And you may want something that's more cheesy and gooey than a plate of noodles.  This baked ziti is just hat the doctor ordered. 

If you've had ziti in an Italian Restaurant (or unfortunately had it at Sbarro's), you may think that it may take a while to prepare, but that's not true.  The preparation for this is very simple and only takes about 15 minutes longer than a batch of spaghetti. 

To add a great flavor for this dish, you can use fresh herbs.  You can buy them in the produce section of your local grocery store.  One package of basil is more than enough for this dish. 

Better yet, when you plant your garden, add one basil plant.  It may sound intimidating, because you may think that you have to do something special.  But that's definitely not the case.  I have no shade of green on my thumb and they've survived my garden for the past two years.

The plant will cost you all of $3.00 at your local nursery.  The great thing is that they are hardy plants and they take very little maintenance beyond the the necessary watering.  I installed a drip system in my garden.  Sounds fancy and all, but it's just a spur off of the sprinkler lines with one long supply hose running the length of the garden.  Using a small punch, you poke holes in the main hose, press small control plugs into the large hose near each plant (extremely easy), and then run little hoses to the base of each plant.  The setup and maintenance of a drip system can take a couple hours when you plant the garden, but it means that every plant gets the right amount of water no matter how windy or hot it gets.  It makes gardening infinitely easier.

Anytime you feel like an Italian meal in the summer or fall, you can pick a few leaves off the plant, rinse them, slice them into ribbons and throw them in the dish.  Their flavor is much stronger and cleaner than the dried basil.  At the end of the season, you can cut the plant off just above the ground, hang it upside down in a cool place for a couple of weeks and you'll have your own freshly dried basil, better than anything you can buy in the store.

Baked Ziti


Makes 8 Servings

1 pound penne pasta
3/4 pound ground Italian sausage
4 cups marinara sauce (one batch of the Quick and Easy Marinara sauce)
1 1/2 cups grated Parmesan cheese
2 cups grated mozzarella
1/2 pound mozzarella cheese sliced thinly
1 1/2 teaspoon red pepper flakes
Your favorite Italian spices

Brown ground Italian sausage in a large skillet.  Once cooked, add the ingredients for the marinara sauce to the sausage to warm it up.  In a large stock pot cook the penne pasta until it is al dente.  Strain out the water and return the penne to the stock pot.  Add the marinara, pepper flakes, 1 cup parmesan, and the 2 cups grated mozzarella and stir until combined.  

Grease a 13x9" pan with olive oil or no-stick spray, your choice.  Pour the noodles into the pan, spreading them out evenly.  Cover the top of the noodles with the slices of mozzarella and sprinkle with the rest of the pepper flakes and parseman on top.  Decorate with the Italian spices.  Place in a 350 degree oven for 10 minutes, then turn on the broiler for 3 minutes or until the cheese on top begins to brown.

Remove from the oven and serve immediately, so the cheeses are all gooey. 

So make a pan of ziti for the entire group enjoy the cheesy, herby goodness.

Monday, March 5, 2012

Quick and Easy Marinara Sauce

I broke down the other night and used a bottled sauce.

Yes, I know.  We have a great marinara sauce that we posted way back in the beginning of the blog.  It's a great recipe for a good, chunky flavorful sauce.

But I was tired.

And it was on sale.

And even though you may not believe this from someone who lives in the kitchen, but I was in one of those moods everyone gets into where 30-45 minutes in the kitchen just sounded too long.  So I picked up the sale sauce and made a basic spaghetti.

And I paid for it.  The sugar overpowered the spices and the sauce was watered down to where a giant reddish clear puddle pooled underneath the noodles.  The money and small amount of time I saved was not worth it.

I should have used my Chunky Marinara sauce, but then I realized that there will be times where you may not have the 30-40 minutes to build a major sauce.  Or you may want a marinara without all the extra ingredients.  Especially if you're going to be using it in recipes where a chunky marinara is not the best.

So after a little trial an error, I have discovered a great basic homemade marinara sauce that takes all of 15 minutes.  It'll be done at the same time as the noodles if you begin when you start boiling your water.  It's easy and it's cheap.  You probably already have the garlic and basil in your pantry.  So your only cost is the tomatoes, which should be equal to or less than almost any bottled sauce out there.  Plus, there's no sugary sweet aftertaste.

And the absolute best part: It's the foundation sauce for so many other recipes.  Whether it be Stuffed Shells, Bakes Ziti, Lasagna, Italian Meatballs, or just a quick pasta dish on a night where you have very little time, it works great!

Quick and Easy Marinara Sauce


Creates 4+ cups of sauce

3 14 ounce cans of crushed tomatoes
1 1/2 tablespoons basil
2 cloves garlic, minced fine
1/2 can (3 oz.) tomato paste

Pour the crushed tomatoes and paste into a skillet over medium high heat.  Add the basil and garlic and stir to combine.  When it begins to bubble, turn the heat down to medium low and allow it to simmer while you prepare the rest of the meal.

That's it...

Let it simmer...

And add it to whatever you want when you're ready.

If you want some meat in the sauce, you can brown it in the same pan before you add the ingredients.  Just drain any excess fat out of the pan before adding the tomatoes.  Do the same if you want to add some mushrooms, onions, olive or any other veggies.

See, it doesn't have to be difficult.  It takes no longer to prepare than cooking a batch of noodles.  The cost is just as much as a bottle of pre-made sauce, and tastes MUCH, much, better.

So the next time you're preparing spaghetti, make your own sauce and truly enjoy the pasta.

Monday, October 3, 2011

Homemade Chicago Deep Dish VS. New York Style Pizza

There’s an old food feud out there: Who has the best Pizza? New York or Chicago? I have tried both and here are my opinions.

So you remember back in April and May when I was sent to the New York area for five weeks? Well, I tried to taste all of the customary New York culinary items. I went to Roxy’s with Liz and sampled a bit of New York style cheesecake… excellent. Ordered a New York street hot dog, and while it didn’t taste bad, it also didn’t cause my stomach and bowels to explode. Walked into a kosher deli and ordered a big ol’ sandwich. It made me a little verklempf. And of course, I tried the New York pizza… six times.

I ordered in twice from local places claiming to have authentic local pizza. Tried a slice from one of the multitude of cloned Ray’s Pizzas, the one in midtown, not the original downtown. Ate a couple of pieces downnear Times Square with Liz. Stopped at a little hole in the wall pizza and beer bar and partook of two slices for lunch one day. And finally ran into the Wall Street Deli and grabbed a sausage slice on my way to the subway after riding the Staten Island Ferry. So I’d say I had a pretty good sampling of the legendary New York Pizza and I’ve gotta say… meh.

Yes, seriously. Meh. None were bad, but none of them knocked my socks off. The crust was great, and the cheese was stretchy. But most of them had pretty bland sauces. Toppings were OK, but the sausage wasn’t the best I’ve ever had. And a few different times, I saw them do the Sbarro trick. Want a slice of pepperoni and mushroom? Take a pepperoni slice, throw on a few mushrooms and put it back in the oven long enough to have the cheese melt around it. Let’s just say I was a little disappointed.

I’ve tried a few different Chicago style pizzas in my life. When I won that X96 Pie contest with the Peppermint Fudge Pie, I was given a trip to Chicago. While I was there, my brother and I went to Giordano’s for a deep dish Chicago-style pizza. It was at least 2 inches thick and stuffed with cheese, sausage and pepperoni. Besides the basic bottom crust, another layer of crust laid over the top of the pie, entombing the toppings and coated with a slathering of spicy tomato sauce. We carved into the brick of a pie and started feeding our faces.

And I felt like I died and went to heaven. Perfect combination of spicyness and sweetness in the sauce. The juices from the sausage and pepperoni had bonded with the cheese into this perfect molten melding of deliciousness. And the crust? The crust was buttery with a mix of garlic. Yes, there was a lot of crust, but what I could shove into my face was great.

I’ve also tried the pies at Gino’s East, which is just as good, if not better. And Connie’s Pizza had locations in Downtown Chicago, Elgin, Near Loyola, and Holladay, Utah (yes, 2000 East and 6200 South) so I’d get takeout from them all the time. And so far, I’ve had yet to have a disappointing pizza.

So sorry NYC, I love you as a city, but you lose as a pizza mecca. Chicago is my winner.

Now Connie’s is gone, so you can’t order from there anymore. Sweet Home Chicago in Draper and South Jordan has some pretty good pies as well. But you can also make this pizza masterpiece in your own home as well. It does take a little time to prepare the crusts and it does take a while to cook (40 minutes), but if you’re willing to take the time to make it, you’ll be extremely pleased with it.

This is one of the few things I cook that require its own special pan. To pull the pizza off, you have to have a deep dish pizza pan. You can pick them up almost anywhere. The metal ones work wonderfully. You can butter them up before placing the crust inside. That way you have no sticking to the pan and the added bonus of the butter being sucked into the crust during the cooking process. I personally use a deep dish pizza stone. Why? Because I received it as a gift for my wedding. It does work very well, but they can be pricey and don’t offer any significant benefit over the metal ones. Use whatever one you’d like.

I have posted recipes for Pizza Dough and Pizza Sauce previously and they work great in this recipe, but you can use your personal favorite as well.

Chicago-Style Deep Dish Pizza
Serves 4 very hungry people or 6 regular people

2 14” pizza crusts
2 tablespoons butter
2 cups pizza sauce
Any toppings you’d like (anything like pepperoni, sausage, salami, ham, mushrooms, olives, peppers, onions, etc.)
1 ½ pounds shredded mozzarella cheese

Use the butter to grease the inside of a deep dish pizza pan. Lay one pizza crust into the pizza pan and press flat and stretch up and over the edge of the pan. Spread 1 cup of sauce on top of the crust to form a thin layer throughout. Sprinkle a light layer of cheese across the sauce to cover it, then add in the toppings you’ve prepared. Add the rest of the cheese to bury the toppings. Place the second crust over the entire pizza and pinch the edges together to form a seal for the filling and a ring to hold in the next layer. Pour the remaining sauce over the top of the pizza, then spread until equally thick. Place in a 350 degree oven for 40-45 minutes or until the top crust edges are a shade deeper than golden brown. Cut and serve after letting it rest for about 5 minutes.

Now on a good day, I can eat four pieces of pizza from your pizza chain. In comparison, two slices of this deep dish will make me want to lay down and rest. But it warms up on the microwave really well, so you can munch on it for a few days at lunch.

So make a pie, share it for family and friends and feel like you’re sitting off the river in Chicago. As for New York… definitely visit and enjoy one of the best cities in the world, but save your pizza money for cheesecake and cannolis.

Monday, March 21, 2011

Fettuccini Alfredo for an unusually cold day

Back on March 7th, it was snowing…  March FREAKIN’ 7th and there were flakes the size of quarters falling from the sky.  And the other morning, there was a layer of ice over everything.  My car was frozen shut.

It’s just wrong.  Everyone around here says, “well, you know…  it can snow all the way to May and there’s even a few times it’s snowed in the mountains in June.  It’s just something you have to live wi…”

NO!!  No, I don’t have to just live with it!  I will create my own weather machine and correct nature’s errors!  I shall confine the snow to November,  December, and maybe early January.  Want a white Christmas?  DONE!  Need a little moisture for your garden or to get you out of going to an outdoor party for that annoying uncle that’s just a little too creepy for your taste?  Done and DONE!  You don’t want rain on your wedding day because it’d be too ironic?  Well it’s really not ironic, just unfortunate…come to think of it, most of that song isn’t really ironic…  anyway… NO Problem! 

OK, maybe the technology isn’t available (yet), but it should not snow after President’s Day, plain and simple.  The only good thing about snowy days like this is that I get in the mood for some really warm, thick, and creamy food.

So it’s the perfect day for some Fettuccini Alfredo.  This recipe tastes great and it only takes 15-20 minutes start to finish!  You boil the noodles, make the sauce while the noodles cook and combine them at the end.  Done!  Clap your hands, show them to the players at the table and walk away like a Las Vegas blackjack dealer.


Fettuccini Alfredo

Serves 4

1 pound fettuccini noodles
6 tablespoons butter
1 cup whipping or heavy cream
2 cloves garlic, chopped fine
1 teaspoon freshly ground pepper
1 cup grated parmesan cheese

In a large stock pot, bring 4-6 quarts of water to a boil.  Add the fettuccini noodles and let them cook for 10-12 minutes until they are al dente.

During that time, you can make the alfredo sauce.  Cut the butter in small pieces so it melts faster and toss it into a skillet or saucepan over medium heat.  Once the butter melts and starts to bubble, toss the chopped garlic into the butter and let it sauté for about a minute.   Next, add the cream and bring the whole concoction to a simmer, just below boiling.  Add the pepper so it can simmer in for the last few minutes.  One minute before the noodles are done, add the cheese and stir until it’s melted into the sauce.  Strain the noodles and shake out any excess moisture.  Portion the noodles onto separate plates and pour the sauce over the top.  Serve with garlic bread and/or salad and top with more parmesan cheese.

It’ll comfortably sit like a large, warm lump in the middle of your stomach and make you want to take a long winter’s nap, even if it’s FREAKIN’ MARCH!!!

Tuesday, March 1, 2011

Stuffed Chicken Parmesan... or How I Convinced My Wife to Marry Me

So we just passed the 7th anniversary of my third date with Liz.   Why do I remember this date so well?  It's the first time I cooked for her.  And it was a milestone in our relationship, which I will explain later.

So on our first two dates, Liz and I shut down two different restaurants.  We became those annoying people who would just sit at a table and talk and talk and talk until the waiters started turning out lights.  Sorry, but when you're having that good of a conversation and you become absolutely captivated by every word she says, you lose track of time.  I was definitely into this girl.  How could I tell?  I had the following conversation with my brother in law, no lie...

B-I-L: So it she pretty?

Me:  She's gorgeous!

B-I-L: So does she have big boobs?

Me: She... um... I have no idea.

Yes, she was so intriguing I did not check her out.  Someone that interesting deserved a third date and instead of inflicting another one-tip night upon another waiter, I offered to cook for her at my house.   She agreed, but I found out later that her mother asked Liz to give her my name, address and phone number, just in case she had to come looking for the serial killer who had her missing daughter.

So I prepared this meal.  Took my time because I wanted to have everything right.  I had made just a basic Chicken Parmesan before, but decided to stuff it with cheeses and use a homemade marinara sauce.  As sides, I did a basic salad with homemade Italian dressing, and french bread with a roasted garlic butter spread.  And of course, did the whole spread.  Candles, tablecloth (well, the somewhat old and out of style one I had), and a couple dozen roses.

(slight diversion here) And NOT red roses.  Two tips to all men out there:  First, red roses are for amateurs.  Everyone gives red roses because they "symbolize love" and the florists can and will charge more for them, especially around Valentine's Day. Well, unless your lady really likes the color red, it would behoove you to find out what she likes and buy those colors instead.  Nowadays, there are multiple shades and flowers with blended colors.  Some of Liz's favorites are Circus Roses, that go from almost a fire red petal tip to deep orange to a yellow-orange center.  Take the time to find out what she likes, it'll show you put more thought into the gift.

Second, don't buy them at a florist.  If you work a little harder, you can make flowers mean a lot more.  Buy your flowers at one of the warehouse stores.  Now hear me out... Liz and I ran a flower business for a few years so we have some experience here.  Costco receives a good deal of their flowers directly from the growers instead of going through a middle man, so they are fresher and, therefore, will last longer.  You never know how long flowers have been sitting in a cooler at a flower shop.  And you'll get more flowers for the same amount of money.  When you get her flowers for the first time, buy a nice vase.  Not a cheap plain vase, something crystal, porcelain, etc., something that is out of the ordinary.  It can be anything that looks nice, just don't let it be the $3.00 plastic variety.  Fill it half full with water and add/mix in the flower food they supply.  Then use a pair of scissors to trim off the bottom inch of each of the stems while you hold them underwater.  The flowers will now absorb the water quickly and they will live for 2-3 weeks.  Give her the flowers and vase, bathe in the appreciation, then collect the vase when the flowers eventually die.  Make that vase meaningful by always giving her flowers in it over and over again.  Do it on her birthday, anniversary, Valentine's Day, Mother's Day (when that becomes appropriate) and at least three times a year just for the hell of it. Trust me, it'll mean a great deal to her.

Anyway, I had the entire scene set for her arrival with the chicken coming out of the oven just as she arrived and for once, one of my romantic plans worked out perfectly.  Not only did the food turn out just right (no burning, YAY!) but everything happened just as it should.  Well almost everything... At one point, Dudley, my little "special needs" kitty jumped onto the table, flicked his tail through the candle's flame and promptly singed the hair off the tip.  Luckily, he didn't become a flaming ball of fur running through the house, but after putting the flame out with a napkin, we both had a good laugh.

Now how was this night a milestone?  Why was this night momentous?  Well, as we were preparing for our wedding, someone asked us how we met and to tell some of our stories.  Liz related the stories of this evening and how she was absolutely amazed at my cooking and romantic nature.  She said, "From that night forward, I knew that I would marry this man."  Yes, I scored a wife with my cooking... Her mother verified this.  She related how Liz called her Mom on the way home and how she said she was completely insane to have this thought after a third date.  Well, I met Cindy a few days after the date, allayed her fears and we all lived happily blah, blah, blah...  

So here is the recipe I used on that fateful night, except for the pepperoni.  Liz recommended I add that and it really added some flavor.  I'd highly recommend going for the larger deli-sliced pepperoni.  It makes the stuffing much easier to do and usually it's cheaper to buy 4 slices from the deli than buying a whole package of small slices.  I happen to like the deli pepperoni's taste more as well.

Stuffed Chicken Parmesan


Serves 4

4 skinless boneless chicken breasts

1/2 cup ricotta cheese
1/2 cup parmesan cheese 
1/2 cup mix of Italian cheeses of your choice
1/2 tsp Italian seasoning
1 tsp basil
4 large deli slices of pepperoni or 16 pizza slices

Bottle of either olive or canola oil
5 tablespoons corn starch
2 eggs
1 cup milk
2 cups Italian style bread crumbs
8 ounces mozzarella
Favorite marinara sauce (use my recipe if you want)

In a mixing bowl, mix together the ricotta, parmesan, Italian cheeses, Italian seasoning, and basil until combined.

Using a meat mallet, hammer, can of tomatoes, or whatever weapon you may have, take your frustrations out on the chicken breasts, pounding them down until they are about 1/2 thick.  Take a sharp knife and cut into the breast from one side, creating a pocket inside.

If you have the large deli pepperoni, take a portion of the cheese and spice mixture  that would fit into the chicken breast's pocket and wrap the large pepperoni slice around it like a taco.  Insert the pepperoni and cheese into the pocket of chicken breast, open taco side first. this will help keep the cheese inside while cooking.  If you have the smaller pepperoni, line the pocket with the pepperoni and then stuff the cheese inside.  Seal the chicken breasts one of two ways: use toothpicks and remember to remove them after frying, or use a long piece of spaghetti like a long toothpick to knit it closed.  Leave the extra spaghetti sticking out so it's easier to remove later.

Next the fry prep.  Gather three bowls and a cooling rack.  Place the cornstarch in the first bowl.  Combine the eggs and milk in the second bowl.  Place the breadcrumbs in the third bowl and place the cooling rack next to it.  Do the following one chicken breast at a time.  Roll the chicken in the cornstarch until a light layer sticks to the breast.  Next, completely dredge the breast through the egg/milk mixture so it is covered, then lay it in the third bowl with the breadcrumbs.  Scoop the breadcrumbs over the breast.  Make sure the entire surface is covered in the breadcrumbs, then place it on the cooling rack.  Repeat with all the chicken breasts and let them sit for 10 minutes so the breading sets.  This will prevent the breading from flaking off in the oil.

While waiting, fill a large saute pan with enough oil to come 1/4 - 3/8 inch up the sides and heat it to 325-340 degrees.  Also preheat your oven to 350 degrees.  Using tongs so you don't burn your fingers, place two of the chicken breasts in the oil.  Cook for 5 minutes per side, making sure every so often that the side doesn't burn.  When removing the breasts, place them on a cooling rack lined with paper towels so the extra oil can drip off.  Remove your toothpicks or break off your spaghetti (whatever stays in the breast willbecome extremely soft and presents no chance of impalement).  After letting them rest for 5 minutes after cooking, lay slices of mozzerella  and shredded parmesan over the top of the breasts and then place them in an oven safe dish.  Put the dish in the oven for 15 minutes to thoroughly melt the cheeses (and to give you time to work on the other accent dishes, like thin spaghetti, salad, veggies, garlic bread, etc).  Finally, remove them from the oven, place them on a plate and cover in marinara sauce (see my earlier recipes for a great homemade sauce) and grated cheese for decoration.  You can use any combination of parmesan, italian and mozzerella you choose.

When you have a special occasion and some time to prepare, try this recipe out and see if it inspires promises of eternal love.  It did for me. :-)

Sunday, July 18, 2010

Homemade Chunky Marinara or Meat Sauce - and a Wine Recommendation!


I grew up a Prego man. My mom used it for all sorts of italian dishes. And honestly, it's not a bad store bought sauce. It's OK in a spaghetti emergency, but you taste the extra corn syrup. I tried a few others... but none of them were that good. Ragu tastes like Spaghetti-o sauce. Paul Newman's is better, but don't warm it up twice, it gets a little crusty.

So once I started cooking in my own kitchen, I thought that I should try to make one of my own. Now there were some suggestions. My ex-wife stated that her mom used to make a sauce out of ketchup... and after holding down the bile that was going to paint our university student apartment cinder block walls, I thought I should start doing some cookbook reading.

You know, marinara sauce can seem like one of the simplest things in the world. But to get the perfect combination of spice, tomato and other accents is pretty difficult. And ironically, it was my current wife who made the suggestions to make this sauce exactly the way I like it.

Ah... my wife. I love her so. She's my culinary guinea pig. I cook all sorts of outrageous recipes and she always is willing to try it. And she's always great at recommending slight changes. She's the one who recommended a small amount of pepperoni to add some extra flavor to the meat sauce recipe. So to my wife, I thank you, I love you and I will always make you anything you desire.

So after years of practice, I think we have a winner. I wanted to make a sauce that didn't require a lot of preparation. You can combine all of the ingredients and as soon as the spices are added, boil the water and cook the noodles. When the noodles are ready, the sauce is as well.

Marinara Sauce


Covers 6 portions of pasta

2 tablespoons olive oil (regular or extra virgin preferred)
2 cloves of garlic, minced
4-5 white mushrooms, sliced to whatever size you prefer
1 28 oz can crushed tomatoes
1 28 oz can petite diced tomatoes
1 small can tomato paste
2 1/2 tablespoons dried basil, or 1 1/2 tablespoons of freshly cut basil
1 tablespoon oregano
1 tablespoon Italian seasoning
1 tablespoon brown sugar

Heat a stock pot or large deep saute pan over medium heat and add the olive oil. add the minced garlic and mushrooms and saute for about 2-3 minutes. Next add the crushed tomatoes, diced tomatoes and tomato paste and stir until the paste is completely mixed in. Now add the spices and the brown sugar (to cut the acidity of the tomato paste) and stir. Once the sauce begins to lightly boil, reduce the heat to medium-low heat and cover loosely so the steam can escape. Better yet, if you have a splatter guard (big metal mesh pot cover), use that instead. Stir every couple of minutes while you cook your pasta. After about 15-20 minutes the sauce should thicken and be ready to serve.

Now a pure marinara is good, but I'm a carnivore. I need to have a little meat in there. Now you can anything you'd like. I've seen hamburger, Italian sausage, pepperoni, salami, chicken, and even panchetta added to marinaras and all of them are great. I really like the panchetta. For those of you have not tried this glorious creation, it's an Italian cured bacon that is sliced like salami. But it's pricey, like $14.99 a pound type of pricey. So what I normally use is the following...

Meat Sauce


Marinara Recipe listed above
1/2 pound ground beef
1/2 pound Italian sausage
2 ounces pepperoni

Follow the same instructions as above, but as you finish sauteing the mushrooms, add the ground beef and sausage and brown the meat. Next, add the tomatoes and spices, slice the pepperoni into very small pieces and add to the mixture. reduce to medium low and cook for 15-20 minutes.

And when your done, make sure you top your noodles and sauce with a little fresh Parmesan cheese.

This sauce also freezes well, so you can double or triple the recipe, place the leftovers in plastic containers and keep in the freezer for up to 3 months. And if you make a large batch, the ingredients you use will be cheaper than the pre-bottled sauces on the grocery store shelves.

I use this sauce for almost any Italian dish I create, like Manicotti, Stuffed Chicken Parmesan or Lasagna. I'll post each of these recipes in the next few months, so keep reading!!!

Oh and before I forget... A good glass of wine always goes will with pasta. Now there are people who say that you have to have a red or a white with a certain type of meal. To them I say, "Why are you being picky? Drink up and shut up!" I like to think that there's never a wrong choice, as long as you like the way it tastes!

My personal wine preference is a Reisling (light white wine) or a Cabernet Sauvignon (solid red) from the Chateau Ste. Michelle winery in Woodinville, Waashington. I was spoiled by its convenience when I lived 3 miles away from the winery during my short stint in Seattle, but I definitely partook of it often. I love how they taste and the name reminds me of my best friend in Phoenix. They're great wines, available almost everywhere and economically priced. My last bottle of Reisling cost $9.00. So if you're looking for a great bottle of vino, definitely try this out.