Tuesday, January 31, 2012

Chicken Fried Steak and Eating at Hole-in-the-walls

You can find some of the best food in the world in the most out of the way places.  Sure, you can fall back on chain food when you're on the road.  I'm guilty of doing it when I used to travel for the old credit union software company.  It's 10:00 at night, you're tired and you don't feel adventurous.  But almost every time I've tried the favorite local fare in a little-hole-in-the-wall restaurant, I've been rewarded.

I tried a little Mexican restaurant in Odessa, TX and found my favorite appetizer of all time, a shrimp stuffed with fresh jalepeno strips and queso blanco, then wrapped in bacon and deep fried...  it's a heart attack waiting to happen but absolutely delicious.  Then there was one of the best burgers and fries I've ever had at the Woodinville Cafe in Woodinville, Washington.  It's just a hole-in-the-wall in a strip mall, extremely easy to drive by, but the fried were cooked to perfection and lightly salted, the burger was seared on the outside and perfectly pink in the interior. 

And then there's Mom's Diner in Salina, Utah.  Located at the southeast corner of the small town major crossroad, it's exactly what you'd except to see when think small-town diner. Nothing frilly or pretentious, all the locals eating a socializing, a pie counter with fresh wares made that morning, etc.  And the portions are large and very delicious.  Last time we were traveling south to meet the family in Koosharem (another story for another time), Liz and I stopped in for a bite.  I had the burger, which was awesome.  But Liz ordered the Chicken Fried Steak.  And it was the perfect piece of Americana.  A round steak pounded flat, breaded and fried in a skillet and doused in a white gravy made from the a bit of the oil from frying the same steak.  The customary mound of mashed potatoes were drenched in the same gravy, rounding out an extremely delicious meal that would sit comfortably in her gut for the remainder of the long car ride.

So I've been trying to replicate that recipe for a while.  The key to a good Chicken Fried Steak is just the right amount and combination of spice.  Too little and your gravy will turn into library paste (which I did on my first attempt).  Too much and it becomes overpowering.  The actual frying of the steak is identical to what we did for our Stuffed Chicken Parmesan.  It's a simple pan fry that lasts long enough to set the coating and cook the steak to a medium state. 


Chicken Fried Steak

Serves 4

4 round or cube steaks
1 1/2 cups flour
1 teaspoon garlic powder
1 1/2 teaspoon thyme
1 teaspoons fresh ground pepper
1 teaspoons sage
1/2 teaspoon cayenne powder
1/2 teaspoon paprika
3 eggs
1 cup milk
1 cup oil

Gravy
1 cup milk
1 cup chicken broth
1 tablespoon flour or cornstarch
1 teaspoon fresh ground pepper
1 teaspoon thyme
1/2 teaspoon garlic powder
1/4 teaspoon salt


Place the steaks between two pieces of plastic wrap.  Using a meat tenderizer or any other large blunt instrument, vent the frustrations of the day upon the steaks until they are about 3/8 to 1/2 inches thick.  Pour the flour and all the spices onto a plate and mix.  Mix the eggs and cup of milk in a bowl.  Dredge each steak through the flour mixture and shake off the excess.  Then completely dip in the egg wash.  Dredge it through the flour mixture again and then let rest on a cooling rack for five minutes.

In a large skillet, heat the oil up to around 330 degrees and cook the steaks for 3-4 minutes on each side or until it's golden brown.  Remove to the cooling rack when you're done.  When the frying is done, pour out all but about 2-3 tablespoons of oil out of the pan.  Return the pan the heat and add the milk to de-glaze all of the little bits off the bottom of the pan.  Add the flour or cornstarch and whisk thoroughly to prevent lumps. Add the spices and cook for 5-10 until it thickens.  Pour liberally over the steak and some mashed potatoes as a side.

So make these steaks for dinner and let it settle in your gut in a very satisfying way for a long night's sleep.

Monday, January 30, 2012

Recipes and Preparations for the Super Bowl

Since we're less than a week away from the Big Game, and yes I said the Big Game.  The reason you can't say the derivative of the largest sporting event on the American calendar is that NFL has a copyright on the term.  And if you advertize anything using the real name of the Big Game for any commercial, you can be subject to fines, inprisonment, ridicule, a no-pad spear by Clay Matthews, etc.  So even though I'm just a blog with a few random ads, that can be clicked at any time by the way, and make so little money off of them, I don't need Roger Goddell's goons showing up on my doorstep. 

So, to be safe, I wanted to give you a couple of suggestions on what you could prepare for the Big Game. Each of these can help feed a group of 4, 8 or 28.  Some make great appetizers, some are main course solutions.  And most can be prepped ahead of time so you're not spending all your time in the kitchen.  Click on any of the titles for the complete recipe.

Recipes for the Super Bowl


Mini Pies

You can make a batch or two of these little sugar bombs and lay them out in the tables for hours.  Make sure to make a variety of them by separating up the filling before adding the flavoring ingredients. 
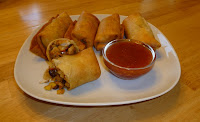
Cream Cheese Wontons and Buffalo Wontons

You can fill these wontons with almost anything you want, be it crab and chreem cheese, chicken and buffalo sauce, chicken and barbecue sauce, or any other combo you want.  Also, you can fold them up and set them in the fridge (or freezer) and then fry them up at the last minute.
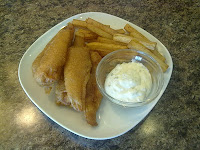
Fish and Chips

This is one you should do at the last minute, but since there could be all sorts of beer around, you have an abundance of raw ingredients for the batter.  One tip, chill the batter for about 30 minnutes before dipping the fish, it turns out even better.
Chicken Tenders

Make them up fresh just before the party, or make the batch and nuke them right before serving the up as an appetizer.  Nuking can make the coating a little softer, but considering everything else you may be making, it could save you some time.  Reheating in the oven is good too.  You can also cut them smaller into nuggets for the kids.
Mini Pizzas

This is something we've done with a group of 20+ during the game.  Everyone just takes turns building their own.  This way, you get a custom pizza and miss maybe 2 minutes of games or commercials, whichever is least important to you.
Southwest Egg Rolls

Another great item to assemble ahead of time and fry at the last minute. But this option does reheat in the oven or microwave very well,  And make sure you have a great salsa to go along with it.
Chili

This can be made at any time, in any abundance, and can be reheated right before the game.  While I like the heat, I recommend making the milder option and providing other sauces and peppers to spice it up so people can add it as they wish.


Calzones

Another premade option, assemble the batches before the day, place them in the fridge and then bake them at the last minute, or even as the game is going on.  If thast doesn't work, you can choose to let the partygoers make their own right before the game starts and then just cook them in shifts.


So try one or two and see if any of them make you the star of the party.

Thursday, January 26, 2012

Breaded Chicken Tenders

OK, so yeah, you can buy chicken strips on a bag at your local grocery store in the frozen section.  Bring them home and cook them up.  They taste fine and they're somewhat easy when you're in a hurry.

But they are NOWHERE NEAR as good as homemade.  Why? Well, first, you don't know the grade of chicken that was used to make them.  They meat doesn't have to be as good as the chicken breasts you buy off the butcher block.

Second, you don't have control of the contents.  Take a look at the ingredient list on that bag.  There are enough preservatives and chemistry in there that eating them on a regular basis is a little frightening.  And for someone monitoring their salt intake, these are definitely not an option.

Third, the ones warmed up in the microwave or oven just don't taste the same as when they are fried up fresh.  The flavors are stronger, the texture in your mouth is better and the smell that remains in the house afterwards is wonderful

Sure, this recipe may take longer than the 35 minutes it takes for the bagged strips to go from freezer to oven to dinner plate, but not much more.  Invest 10 extra minutes into making your own and you'll never want to eat flash-fried strips again.

If you have picky little kids, you can also cut the strips up into nuggets and cook them up that way too.

Breaded Chicken Tenders

Serves 4-6

2 quarts of oil (almost any type will work)
2 pounds sliced up chicken breasts or tenders
3 eggs
1 1/2 cups milk
1 1/2 cups flour
1/2 teaspoon onion powder
1/2 teaspoon garlic powder
1/2 teaspoon  paprika
1/2 teaspoon sage
1 teaspoon thyme
1 teaspoon Montreal chicken seasoning (optional)
1 1/2 teaspoons baking powder

Place a large saucepan, stockpot or saute pan on the stove and fill it with enough oil so it comes at least 2" up the sides of the pan.  Put it over medium heat so it can heat up while you prepare the strips.  Use your thermometer and don't let the temperature go over 330 degrees.  If it's getting close and you're not done preparing the strips, drop the heat to low until you're done.

In a large bowl, beat the eggs and milk together.  In another large bowl, add the flour and all of the spices together and whisk them all together, so the spices are interspersed throughout. 

Now the coating.  Using a pair of tongs, grab the very end of a chicken strip and dunk it in the egg wash.  Next, lay it down in the flour mixture and use a fork to scoop the flour on top until it's coated.  Lift it up and shake off the excess flour.  Take that same strip and repeat the process: dredge through the egg wash, cover in the flour and shake off the excess.  This gives the strip a nice even coating all over.  Place the strip on a cookie cooling rack and let it rest there while you coat the rest.  Letting them rest will solidify the coating so it doesn't float off while you fry.

When they're all coated, start frying.  Check your oil to see if it's around 330 degrees.  Using the tongs, place the strips you coated first into the oil.  Don't crowd the pan too much.  Allow them to cook for 5-6 minutes until they are golden brown.  Evacuate the cooked strips to another cooling rack with some paper towels underneath to soak up the mess.  Move onto the remaining strips until all are cooked.

When they're all done, serve with any type of dipping sauce you'd like: barbecue sauce, hot mustard, sweet and sour sauce, ketchup, fry sauce, marinara, etc. 

So fry up a batch today, eat until you're stuffed and avoid the frozen bags from now on.

Monday, January 23, 2012

Fish and Chips and living in Seattle

I've always liked seafood, but after living in Seattle for a couple of years, a desire for really great seafood becomes ingrained in your soul.

Whenever you live near the sea, you can find great seafood and Seattle is no different.  I mean, Seattle is world renown for some of the greatest fish, and of course the most inventive way to package it.  I've seen the fishthrowers myself.  I've caught a fish from the fishthrowers.  It was awesome!  But as much fun that was, the fish was just as delicious.

And if you don't want to cook it yourself, there are dozens of places that serve up delicious seafood all over the metro area.  There's Chinooks at Salmon Bay.  It's about a ten minute drive northwest of downtown Seattle on your way to the Crittenden Locks. You'll eat exquisite seafood while peering out at the fishing boats that caught the fish moored just outside.  I was lucky enough to have a little hole in the wall seafood fry house up in Bothell when I lived in the north end.  I forget the name, but they had a fisherman's platter of all sorts of fried seafood: cod or halibut, shrimp, scallops, clams, and calamari.  I'd skip lunch altogether so I could have a chance of devouring all this monstrosity on the way home.

Then there's the Athenian Restaurant and Bar located just north of the fishthrowers in Pike Place Market.  The food is great, but the view is better.  Go up the stairs to the top and you'll have possibly the best view of the Puget Sound in town.  You'll be just above the rest of the market and high enough so the Alaska Highway doesn't obstruct your sightlines.    On sunny spring and summer days, which aren't as rare as you'd think they would be, you can see all the way across to Bremerton, and then see the towering Olympics behind them.  If you ever make it there, sit in these seats.  And if you're lucky, the windows will be open slightly.  That way, you'll have the occasional seagull land on the perch and beg for your fries.

Now that I'm landlocked in Salt Lake, we still have a few good seafood restaurants.  If I had to choose one, I'd choose Market Street, because they do fly some of their seafood in same day.  It's fresh and delicious, and you will pay a pretty penny for it.

But there are times that I want a large seafood fry and I've found that I can make it at home for about half the price.  We've already talked about frying shrimp.  But lets talk about frying us up some fresh fish.  Now you can use any type of fish you can get your hands on.  I really like the firmness and taste of cod.  Halibut is absolutely heavenly when it's fried.  But both of these can be pricey.  Catfish can be great as well, and it'll make you think more of the deep south.  But if you're looking for an inexpensive option, tilapia is tasty, and can be found for about $5-6 a pound at the butcher block.

No matter what you choose, MAKE SURE it's boneless.  Nothing's worse than finding a small, spindly bone stabbing into your upper palette.

Now we've talked about dredging food through an egg wash and some other type of starch to get a great coating for deep frying.  But for this food, we need to create a batter like we did for our Orange Chicken.  It's the same portions as before: 1/2 cup starch, 1/2 liquid and one egg. But we have some specific changes. First, your liquid is beer.  It can be any type of beer, but remember the cardinal rule about cooking with alcohol, "Never use any alcohol that you wouldn't drink by yourself".  It's not worth using the cheap stuff like Pabst Blue Ribbon, unless you really like it.  And don't worry about the alcohol, it will cook out.  Also, this recipe has one other ingredient.  We add a little baking powder to the batter so it will come out puffy and slightly craggy, creating extra pockets so you'll collect a little more tartar sauce when you dip.

And what goes better with fried fish than some fresh french fries.  Now the fries I make with the fish are cooked twice.  This way they don't get too dark, and they are cooked thoroughly.  Sometimes, raw potatoes that are freshly fried can scorch before the centers are cooked through.  So I cook them for four minutes, remove them from the oil, pat them dry, and cook them again about 5 minutes later.  That little rest allows the heat to penetrate into the center of the fries.  This way, the fries are crispy on the outside, but warm, fully cooked and squishy on the inside.

One last tip for the fries... Uniformity is key.  You can cut the fries into any shape, but they should all be the same shape with the same width, height and depth.  If they're different sizes, some will burn before the others are done.  I was given a potato slicer for my wedding and I use this when I make fries.  You can do this, or you can use a mandolin or food processor to cut them into uniform bits.  You can even cut them by hand, but try your best to make them all the same size.

Fish and Chips

Serves 3-4


Fried Fish
Bottle of canola or vegetable oil
1 pound fresh fish (halibut, cod, tilapia or catfish preferred)
1 cup flour
1 cup beer (your favorite type)
1 teaspoon baking powder
2 eggs

Pour the flour and baking powder into a bowl and whisk to combine.  Add the beer and the eggs and whisk it again until it's well blended. Place it in the fridge and allow it to chill while the oil heats up.

Pour enough oil into a large saucepan or saute pan to come 2-2 1/2 inches up the sides. Begin heating the oil, but do not let it go over 340 degrees.

Slice the fish filets into long thick strips and rinse with water.   Once the oil has reached at least 330 degrees, using a set of tongs, dip a filet into the batter and then directly lay it into the oil.  Repeat, but do not add too many filets to crowd the pan.  Cook for 4 minutes or until the exterior is a deep golden brown.  Remove the fish to a cooling rack with some paper towels beneath to collect any dripping oil.  Continue until all of the fish is cooked.

If you want to keep them hot while the other items cook, place them into a 200-225 degree oven.

Now either you can cook the fries in another pan or in the same pan before or after you cook the fish.  Either works great.

French Fries
Cooking Oil
1 to 1 1/2 pounds russet potatoes

Heat 2 inches deep of oil in a saucepan or a saute pan to 330 degrees.  Slice the potatoes into uniformed bits, preferably around 1/4-1/2 inch thick.  You can use a potato slicer, mandolin, food processor or a knife, your choice.  Pad them with a paper towel to remove as much moisture as you can.  Next, add enough of the fries to the oil to not crowd the pan and let them cook for 4-5 minutes.  After 4-5 minutes, remove them to a cooling tray and add another batch to the oil.  Pad all of the oil off of the first batch of fries and let them sit until the second batch has had it's first dip in the oil.  After removing the second batch from the oil, put the first batch back into the oil and cook them for another 4-5 minutes.  When you remove this batch, leave them on the cooling rack and let the second batch cook for another 4-5 minutes.

If you have more to cook and you want to keep them warm, move the cooling rack to a 200-225 degree oven until all are cooked.

Place portions of fish and fries on each plate and garnish with tartar sauce and ketchup.

So cook up a steaming pile of fried fish goodness to curb your craving for seafood.  And try the tartar sauce on the fries, it's what the Seattlites do.


Thursday, January 19, 2012

The 5 Cookbooks In My Kitchen

So I had someone ask me how I learned to cook...

I have had no formal training at all.  Sure, I'd love to spend a few months at the Culinary Institute, but I don't have thousands of dollars.

All of my training was done in whatever kitchen I had access to.  My mom taught me a great deal when I was young (see the Coconut Cream Pie post for the story).  There's a lot I learned from practicing, and from burning, overcooking, over-spicing, and generally destroying a number of meals.

But I also learned a WHOLE lot by reading some cookbooks.  Yes, reading a cookbook.  I know that when you're looking for a new recipe, you'll go to the index, find the meal you want to make and just get the details.  But if you have a few free minutes, it's beneficial to thumb through it and see the variety of food out there.  Most good cookbooks will go beyond just the details of the recipe.  They'll explain the steps in more detail, explain the techniques used to create the look and taste of the food, etc.  So not only do you get a good recipe, but it may inspire you to create something new.

A number of years ago, I signed up for a Cookbook Club.  It's a lot like the old CD clubs: get a bunch for free to start and then agree to buy a few more in the future.  I ended up with WAY too many, so now the majority of them sit on a shelf in the basement.  Partially because I don't have room in the kitchen, but partially because they have one or two good recipes and that's it.   Moral: Don't judge a cookbook by its cover.

There are thousands of different cookbooks out there and it's impossible to know which ones are the best.  Now to prevent you from spending $30 on a cookbook that will eventually become a doorstop, let me recommend my top 5 cookbooks.  These are always nearby as reference materials.  They not only have great recipes, but the extras inside, such as conversion tables, technique demonstrations and explanations of the processes will definitely improve your culinary skills.

The 5 Cookbooks in My Kitchen


Better Homes and Gardens Cook Book - "The Old Standby"

This was the first cookbook I was given.  I received it as a wedding present back when I was way too young to get married.  It's a great collection of classic recipes.  But it's not only that.  It's the best basic cooking reference for the amateur cook.  A number of the recipes have variations to show their versatility.  And by showing you how you can mix up a recipe, it can inspire you to be creative as well.  If you know a young couple getting married, this really does make an excellent gift.  Oh, and make sure that when you buy it, you go with the Ring-bound version.  It'll hold up to the wear and tear you'll inflict upon it.


The Best Recipe - "One of the Best Learning Tools"

This comes directly from the Cooks Illustrated Magazine, the people behind America's Test Kitchen on PBS.  This cookbook has a great selection of basic recipes they have developed through trial and error.  And they detail the steps they took to reach their conclusions along with the recipe.  So you can learn a great deal about cooking by just reading the prefaces.  There's a whole series of these books, some focus on desserts, some focus on certain strains, such as Italian or Chinese.  All are good, but if you're going to get only one, start with this one.


I'm Just Here For The Food - Alton Brown - "The Ultimate Teaching Tool"

OK, for some food snobs, what I say next may be sacrilegious.  But I truly believe that Alton Brown has helped out the home chef in the past 15 years as much as Julia Child did for the home chef 30-40 years ago. His show, Good Eats, not only presents some great food, but he explains the science behind it all in a very entertaining way.  Yes, some of rigs and cooking apparati he uses on the show are a little extreme, but for a science geek like me, this kind of complexity is exactly what I need.  I can pull what I want from the show and ignore some of the extraneous items.  This cookbook has great recipes, but it also describes how and why a technique works.  Wanna learn how to fry something?  He'll give you multiple ways to do it and a few recipes along the way.  His entire series of Good Eats books are great.  But if you have a geek in the household that wants to learn how to cook, buy him this.


The Professional Chef - "Learning the Restaurant Tips and Tricks"

OK, now we're to the upper level courses.  This is serious stuff.  We're talking about how to prepare large amounts of food.  We're learning specific, extremely skilled preparation techniques.  We're talking expert level creations. We're talking extremely fancy food.  Yes, I've learned a lot from this book, but I use this one more for inspiration than anything else.  If I get a wild hare from trying something in a restaurant or from seeing something on a cooking show, I'll use this book as my reference guide.  This is also the only cookbook I recommend getting secondhand or from a DEEP discount bookseller.  The cover price is very steep (over $50) so look for is used on Amazon, eBay or any other recycled book seller.

The Best Local Cookbook You Can Find - "Because you gotta go local"

Wherever you live, you should learn to cook like the locals.  Because if you learn about the local food, you'll learn more about the local area.  When I lived in Seattle, I had a great seafood cookbook that unfortunately was lost in the move.  By reading that one cover to cover, I learned what was available in the area, but I also learned why some people prepared what they did.  The cookbook mentioned the Underground, which led me to the discovering about the city's seedy beginning.  Since I'm back in Utah, it's the Lion House Cookbook.  Why, because it's got some local cuisine and it's the Lion House, one of the early homes of Brigham Young and his multitude of wives.  It's now a restaurant run by the Mormon Church and the book has some of the best baked goods you will find.  Basically, no matter where you live, search out some local cuisine and learn more about your area.

So those are my Top 5 for now.  Feel free to get any or all of them.  But go out and find a few of your own. Take a minute in a Barnes and Noble to thumb through a book.  Or better yet, if you see one you like, check it out from your library and give it a trial run. Then go buy it on the cheap online.  Either way, buy one or two and use them to inspire your own cooking.


Monday, January 16, 2012

Great Seared Ribeye, New York or Filet Mignon Steaks in the Dead of Winter

This time of year, the opportunities to grill out in the backyard are few and far-between.  But you can still crave a great steak.  One where the exterior is seared just right so that small amount of crust is formed.  Yet the interior is still perfectly medium rare.  Something like the ones you would pay at least $30 for in a high-level steakhouse.  The problem is that right after Christmas, very few of us have the available funds for an expensive meal.  So how can we get the same great steak at home for a quarter of the price?

Well, you can shop some of the ads for a great deal on steaks.  You can find New York or ribeye cuts for around $5.99 a pound at all sorts of places.  And if you don't mind doing a little cutting, you can get three or four pounds worth of tenderloin, which is where you get filet mignon, for $6.00 a pound at WinCo.  All of these cuts are nice and tender, as they come from along the back of the cow, the most tender area.  Do not gnaw on the back of a live cow to test this, the consequences are dire, trust me.

The rule of tenderness is that the meat is softer the further away you get from the ground.  The more the muscle has to work, the stronger it is and the tougher it gets.  That's why the flank and strip steaks, taken from the belly of the cow, is extremely tough and usually needs to be cooked long and slow,  possibly even marinated for a period of time.

And since these prime steaks are on the opposite side of the cow, it would make sense that we'd need to cook them completely differently.  You want to apply high heat for a short period of time.  In the steak houses, they do a really quick sear over extremely high heat to create that exterior crust.  And during the summer, you could possibly create that level of hellfire over your barbecue grill.  Problem is that when there's a few feet of snow outside and it's below 20 degrees outside, it's a little difficult to do.

So to create that crust, we're going to do a couple of things.  First, we're going to salt and pepper the meat and let it sit at room temperature for about 30 minutes.  The salt on the surface of the meat will pull a little bit of the moisture to the surface of the meat, which will in turn bring some of the animal proteins as well, and that it what will crust over when we cook it hot and fast.  I'd recommend not spicing it more than just the salt and pepper.  Reason being is that most other spices will burn to embers under the extreme temperature we're going to use.  You don't have to worry about salt and pepper because pepper is extremely hardy and salt, well, is a rock and rocks don't burn.

Second, we're going to drop them in a hot pan over high heat with a little bit of oil in it.  The direct contact to the pan and hot oil will heat the surface of the meat quickly and get that delicious crusty feel.  Now this will cook the outside, but it leaves the interior almost uncooked.

To complete the cooking process, we're going to toss them a low heat oven.  This will help maintain the heat on the outside, but the radiant heat from the oven will push just enough heat from the searing into the meat slowly, finishing it off to a perfect medium rare.

And the best part is that while you're waiting for them to finish, you have a little extra time to prep your sides, set the table, light the candles, etc.

Seared New York, Ribeye, or Filet Mignon Steaks

As many steaks as you have guests
Salt (freshly ground sea salt is best, but any will do)
Freshly ground pepper
2 tablespoons of canola oil

Thirty minutes before cooking the steaks, remove them from the fridge.  Sprinkle the salt and pepper over the steaks and allow them to rest on the counter so they come up to room temperature

Place a large skillet over high heat.  Preheat your oven to 275 degrees.  Once the pan is heated, add the oil to the pan and whirl it around.  Within 10-30 seconds, the oil will be fully heated (if you start seeing smoke, immediately move onto the next step). Lay the steaks in the pan, watching out for bubbling oil.  Allow them to sear for about 3-4 minutes.  Flip them once and sear for another 3-4 minutes.

Once the sear is over, transfer the steaks to an oven safe pan and place them into the oven for 8-10 minutes.        Then remove from the oven and allow them to rest for 5 minutes before serving.

So try making one of these steaks instead of spending $100 at a steakhouse. It'll be just a good, and you'll have enough money leftover to eat for the rest of the week.


Thursday, January 12, 2012

Beef and Vegetable Soup

During the wintertime, my mom would make this beef vegetable soup in the crock pot.  It's the perfect simple dinner for a weekend.  She'd prep the entire soup before we'd start cleaning on Saturday mornings or before going to church on Sunday.  By the time we got home, the smell would permeate the house.  And after cooking for hours, the beef would be tender and the potatoes and carrots would almost fall apart.

It's a tomato and beef broth base with just a few spices and stocked with different vegetables.  And the best part is how easy it is.  After cutting up the veggies, you dump all the ingredients into a crock pot and let it do the work for you.

What you put in this is completely up to you.  The recipe below is what I used for the picture above, but you can add any type of vegetable you'd like.  I've added 1 cup of fresh mushrooms, or 1 cup of zucchini medallions, or even 1 cup of cauliflour broken into small pieces.  All of them bring different flavors and I've yet to find a combination I don't like.

I'd recommend that you cook a batch of rolls just before you're ready to serve.  Not only will it go well with the soup, but you can use it to sop up any excess liquid when you're done.

Beef Vegetable Soup

Serves 6-8

2 pounds pounds stew meat
3 cups diced potatoes
2 cups of carrots, cut into mini-bite size pieces
3 stalks of celery, sliced into small half-moons
1 small onion, sliced into half-moons
48 oz stewed tomatoes
48 ounces low sodium beef broth (three cans)
2 teaspoons thyme
1/2 teaspoon sage
12 peppercorns
2 bay leaves

Add the meat and all of the vegetables into the crock pot.  You can brown the meat in a skillet over high heat if you want to get a crusty sear on the beef, but it's not mandatory. Next, add all of the vegetables. Pour the stewed tomatoes and beef broth over everything and stir.  Add the thyme, peppercorns and bay leaves and crank the crock pot up to low.  Cook for 6+ hours in the crock pot on high, so the smell resonates in the air.

Remove the bay leaves before eating and watch out for the peppercorns.  If you bite into them, they'll be really spicy.  Server hot and with some sort of bread or roll.

So make it easy on yourself and serve up a batch of this really great soup this weekend.

Monday, January 9, 2012

New England Clam Chowder

It's finally starting to get cold outside.  Really cold in the morning.  Car-doorlock freezing cold.  Tongue sticking to the flagpole type of cold.  Eye-skin stinging kind of cold.   The kind of cold that actually causes your tires to shrink up, along with many other things that could, but won't be mentioned.

And the best way to warm up is to eat a bucket of soup.  Now if I'm looking into a heat that will clear out my sinuses, I'll do a Hot and Sour soup.  If I'm looking for a little bit of spice, a Taco soup or a Chicken Tortilla soup would be great.  But if I'm looking for an item to warm me to the very marrow of my bones, it's Clam Chowder. 

I've eaten it since Mom used to make it a number of times in the winter.  But I really enjoyed it when I lived in Seattle.  It was everywhere.  All sorts of restaurants had it readily available.  And there was the standby of Ivar's where you could get it by the cup, pint or quart.  I'd pick some up on the way home, crank up the fireplace, grab a homemade quilt and nosh on it while watching the tube.  So to me, it has a very comforting feel.

Now this recipe is pretty simple to make.  But the accoutrements can make a big difference.  I highly recommend eating it with some quality sourdough bread.  A sourdough bread bowl is the best option.  Not only do you get the top and the hollowed out filling of the bowl for dipping, but you can eat the remnants of the bowl that has sopped up the liquid as the soup as set inside.  And by the time you're done, you should be adequately stuffed and heated up.

New England Clam Chowder - Serves 4

1 tablespoon butter
1 cup celery, finely sliced
1/2 cup diced onion
2 tablespoons olive oil
2 more tablespoons butter
2-3 tablespoons corn starch
2 cups milk
2 cups whipping cream
4 ounces clam juice
2 1/2 cups potatoes, cut into 1/2 inch cubes
1 1/2 teaspoons thyme
1 bay leaf
2 6.5 ounce can chopped clams

Drop the first tablespoon of butter into the bottom of a stockpot or a large saute pan.  Add the celery and onion once the butter has melted and saute for about 2-3 minutes.  Remove the ingredients to a bowl and add the olive oil  and butter.  Once the butter is melted, drop the cornstarch into the pan and stir for a couple minutes until it all combines.  Poue the milk, cream, and clam juice to the pan and dump the celery and onion back into the pot. 

Add the potatoes to the milk and cream once it begins boil and then drop to a simmer.  Allow the potatoes to cook for about 12-15 until cooked through.  Add the clams with the included juice into the pot and simme for another 2-3 minutes.  Remove from the heat and serve with sourdough bread, or in a sourdough bread bowl.

So make a batch, put on your warm sweats and comfy slippers, wrap up in a blanket and eat a bowl or two to warm you up inside and out.

Monday, January 2, 2012

French Onion Soup

The onion is probably the most flexible vegetable out there.  Think about it.  Is there a cuisine that doesn't use onions in one way or another?  Mexican, Italian, Chinese, Japanese, Thai, Middle Eastern, all have major dishes with some form of an onion.

And they're extremely versatile.  Put slices on your burger for a crispy bite.  Dice them up for some extra flavor and texture in your chili. Stir fry them in a lo mein and that slight soft feel mixed with all the other vegetables is great.  Dice and saute for all sorts of applications.  But probably my favorite is to slowly saute until they start to carmelize and get sweet, tender and almost transparent.

And that's what French Onion Soup is all about.  Getting that flavor infused into a great soup.  The secret is to slowly saute a LARGE amount of onions over time.  The carmelization will build up on the pot and then when you add the broth, all of it releases off the pot walls (deglacing) and blends in with the soup.  Now you can cook the onions all at the same time (my preferred method)... or you can cood the onions in shifts.  Just make sure you use the same pot in the application.  That way, any leftover bits or small carmelized onions that stick to the pot can deglace into the soup.

Also, I recommend you use a fresh baguette to top the soup, or some sourdough bread.  In a pinch, you could use large croutons.  They turn out OK, but they can add a lot of salt and if they are too small, they may just disintegrate into the soup.

French Onion Soup
Serves 4-6

6 tablespoons butter
6 cups onions, cut into very thin half moons
1/2 cup red or white wine, your choice
2 quarts beef broth (or 1 quart each of beef and chicken broth)
2+ teaspoons thyme
1 teaspoon freshly ground pepper
Slices of a french baguette or sourdough bread
2-3 cups grated Gruyere cheese (or mozzarella if you can't get gruyere)

Melt the butter in a stock pot or a VERY large saute pan over medium heat.  Once the butter is melted and slightly boiling, add the onions and stir so they are coated.  Allow them to saute until the onions are becoming translucent, about 10-12 minutes, stirring occasionally.  If they start to singe, reduce the heat slightly and keep them moving.  Once they start to become translucent, add the wine and stir until it's mixed in. Have a glass of wine yourself.  You deserve it. Let the onions cook over medium to medium-low heat for another 12-15 minutes until they start to carmelize.

Once that happy moment of doneness has been reached, pour the broth into the onions (watch out for steam) along with the thyme and pepper.  Allow it to simmer for another 10-20 minutes so everything can infuse.  At this point, turn on your broiler and set it on Low.  Next, fill your serving bowls 3/4 full with the soup.  Slice pieces of the bread so it will cover the top of the bowl and drop them in.  In an absolute emergency, you could use croutons, but I like the bread much better.  Cover the bread with the grated cheese. Place the bowls on a large cookie sheet and place under the broiler until the cheese has melted and begins to brown.  Remove and serve immediately.

So make a batch of this today and appreciate how great a basic onion can taste.