We're entering 2012 over the weekend. But before we do that, I just wanted to thank all of you for reading the blog this year. We couldn't have done it without all of you. Your support of the blog by reading all the articles, passing them onto your family and friends, inviting others to follow us and clicking on the ads (which most of the proceeds go to the Johnson Boys College Fund) have helped us to grow this food blog to a scope beyond anything I would have imagined.
This blog has blown up over the past few months, we're averaging over 1,000 visitors a month now. We have readers all across the US and in at least 20 foreign countries. We've published close to 70 different recipes this year, along with some product reviews and tips and tricks for the kitchen. We've had some wonderful experiences with great companies like Sub-Zero, Noodles and Company and Orson Gygi. And we've given away all sorts of prizes to the loyal readers.
And in the year to come, it's only going to get bigger and better. First, you're going to see more activity, averaging 2 posts a week. The goal is to add another 100 recipes by the end of 2012. We're also starting a restaurant review feature, which you will see in the first part of January. Oh yes, there will be more prize giveaways to the Facebook followers. And we'll be experimenting with some new media, including audio recipe cards and video spots on YouTube.
And now... for next month's recipes. We're starting off the month with a few soup, stew and chowder recipes to help warm you up as temperatures continue to drop. The second half of the month will feature some fried food. Recipes like fish and chips, chicken strips and chicken fried steak: meals that will settle in your stomach and keep you warm and full for hours.
So stay tuned for all the new enhancements coming your way...

Follow us on Facebook, Twitter and Pinterest! Also, do all your shopping in our Amazon Store! My own personal food blog, supplying you with my favorite recipes, some cooking tips and suggestions on how to make cooking at home enjoyable and simpler. Come for the variety, but stay for the pie...
Friday, December 30, 2011
Tuesday, December 27, 2011
Mommy and Daddy's Special Holiday Hot Chocolate
So it’s the end of the year, we’ve made it through another holiday season. The toys have been torn from the wrapping and packaging and now are strewn across the floor. The kidlings are playing with the treasure troves. But you’re almost ready to leave the holiday behind. The leftover ham is still really good, but getting repetitive. The Christmas lights have started to lose their luster. And there’s nothing... I say NOTHING on TV.
We’re all burned out and ready for a long winter’s nap, or at least a long recline on the couch in a pair of sweats with a blanket over your legs while you watch the snowflakes gently fall past the window pane. It’s time to make mommy and daddy to make some special hot chocolate that’ll make their tummies get all tingly.
Yes, alcoholic hot chocolate. It can be really good at the right time, a time when you can enjoy a little buzz. I like to send the kids over to Gramdma’s house for a sleepover, serve a romantic hearty meal for Liz, serve up some great light dessert, and then finish the night sipping this drink while watching both a movie in a darkened living room and the snow as it falls.
Now that’s the premium setup... You could also do this on a Saturday afternoon for one of the parents while the other plays defense. Either way, it tastes really good.
Since it’s the holidays, we have a few different selections for the liquor, so use whatever you would prefer.
‘Special’ Holiday Hot Chocolate
Makes one 12 oz. serving, double or triple it up as you need to
Whipping Cream
1/8 cup powdered sugar
1/2 cup whipping cream
1/2 teaspoon vanilla
Hot Chocolate
10 oz warm milk
¼ cup semisweet chocolate chips
1 shot of any of the following liquors
For Candy Cane Hot Chocolate: 1 shot peppermint schnapps
For Orange Stick Hot Chocolate: 1 shot Orange Liqueur
For Raspberry Stick Hot Chocolate: 1 shot Chamboard or other raspberry liqueur
For the whipping cream, place the sugar, milk and vanilla into a bowl and beat quickly with a hand mixer until thick.
For the hot chocolate, warm the milk in a small saucepan to a simmer. Add the chocolate chips and stir until they’re completely melted. Remove from heat and allow to cool for a few minutes (if it’s over 170 degrees, the alcohol will evaporate a little). Once it has cooled to below 170, add the shot of your choice and stir. Pour into a tall coffee mug. Drop a large dollop of whipping cream on the top and sprinkle any kind of decoration you have left over from the holidays (small candy cane pieces, cookie sprinkles, shaved chocolate pieces, etc)
So take a load off, relax and take one last swig of holiday magic before you start thinking about New Year resolutions.
Friday, December 23, 2011
Christmas Giveaway Winners!
Well, by now, I hope you all are done with 95% of your hoiday preparations. I still have a Raspberry Pretzel Salad to make for the Christmas Eve party and sneak out to buy one present for Liz. I should be able to get that done tonight. You know, every year you think you're going to be more on the ball next year. You'll plan better, do more of it early. Maybe get your shopping done by the day after Thanksgiving. Maybe get the Christmas cards sent out by the 15th. Maybe spend a weekend just enjoying the season instead of catching up on all the other Christmas tasks that haven't been done yet.
Yeah, that'll happen some year. Time disappears way too quickly and life gets in the way. So there's always something left to the last minute. I swear I'll map everything out into a giant Christmas roadmap so I can schedule some free time. Yes, I can be anal like that. But there is one thing I am going to do on time and that's give away gifts to my readers.
So without further ado, let's announce the winners of the Christmas Giveaways!
$20 Orson Gygi gift card - Josh Nelson
Large Noodles and Company meal pack - Michele Hudson
Small Noodles and Company meal pack - Judi Martin
Congratulations to all the winners and thank you all for being part of the blog. Merry Christmas to everyone and check back next week for one final holiday/winter recipe and to learn about what's in store for the new year .
Wednesday, December 21, 2011
Christmas Giveaway Reminder
Just a friendly reminder. This Friday, we'll be giving away Christmas Presents to three lucky readers. The prizes include.
$20 gift certificate to Orson Gygi
A large Noodles and Company multimeal pack
A small Noodles and Company multimeal pack
REMEMBER!!!! If you refer people to Like the That Means We Get Pie Facebook Page, you get EXTRA ENTRIES!
Here's how you can enter to win!
1. If you are already a Facebook friend, congratulations, you're automatically entered into the contest.
2. If you're not a Facebook friend, become one by clicking on the new Like link at the top right area of the That Means We Get Pie Home Page, or log into Facebook, look for the That Means We Get Pie page and click Like at the top of the page. You'll then be a friend and be entered in the contest.
3. You get extra credit for referring new people to the site. If you convince them to become a Facebook friend, have them e-mail ThatMeansWeGetPie@gmail.com and state that you referred them. They'll get an extra entry and so will you! Refer as many people you like and have them e-mail us, there's no limit to the number of entries you can earn.
So tell everyone you know to Like the page so you can get as many entries as possible... and so you can give a Christmas gift to someone through us.
Monday, December 19, 2011
Peppermint Candy Cane Ice Cream with Hot Fudge

Sure, this time of year, you can find tubs of Peppermint Ice Cream from almost every brand. I've found that Dreyer's isn't too bad at all, but you can make it at home rather easily. And I really like the extra creaminess of the homemade ice creams, since this recipe uses fresh whipping cream and whole milk.
It's a great thing to make with the kids as well. Short of the cooking stage, they can do almost everything else. Let them add the flavoring. Let them crush the candy canes and add them to the ice cream at the end. Let them work the ice cream machine as well and help them share the beater when the mixing is all done.
And above all else, make sure you add some hot fudge before serving it. The heavy chocolate flavor mixed with the fresh and cool mint is a perfect combination.
Peppermint Candy Cane Ice Cream
1 cup whole milk1 cup whipping cream
1 cup sugar
Red food coloring
1 teaspoon vanilla extracts
1 teaspoon peppermint extract
4 candy canes, crushed
Pour the milk, cream and sugar into a sauce pan and cook to a simmer. Add enough red food coloring to turn it a candy cane shade of pink. Remove from the heat, pour into a tupperware bowl and chill in the refrigerator until it's completely cooled. Crank up the ice cream maker, pour in the cream mixture and add the extracts.
Let the ice cream churn for the recommended time in your ice cream maker's instructions (usually 20-35 minutes or until the mixture thickens. While waiting, place the candy canes in a large ziploc bag. Using a rolling pin, tenderizer, nutcracker, or your favorite blunt object, take your grinchiness out on the canes until they are broken into very small pieces. When the ice cream is almost done, pour in the candy cane bits and let it mix for about one minute. Pour the ice cream into a tupperware bowl and freeze for another 2 hours.
Serve with hot fudge poured over the top and any other Christmas garnish you want.
So make a batch of this and snack on it when the heat in the kitchen gets too high.
Wednesday, December 14, 2011
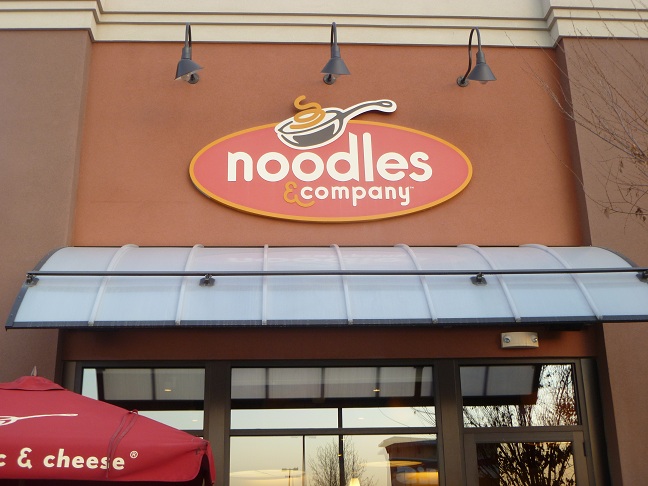
A Visit to Noodles and Company and how to win free food!
So here's a lesson on why being a little adventurous is a great thing.
 I was presented with a very unique opportunity. I was invited to a tasting event at our local Noodles and Company. Now I've been a fan of Noodles for a long time. I've always thought of it as a healthier alternative for lunch than most of the quick lunch options. And if you call ahead, it's MUCH faster than sitting in a long drive-thru line. But like almost everyone else, I have my one or two favorites (The Indonesian Peanut Saute and the Pad Thai) that I order every single time. It's human nature to fall back on secure options, even when there are a multitude of choices. Which can be a shame, because as we learned at Noodles and Company, there are so many great options out there.
At this tasting, we'd be trying almost everything on the menu. And since there would be a large volume of food, I brought along a posse.. well maybe not a posse, it's hard for me to roll like Jay-Z and very few want to roll like Kanye. But I did want a wide variety of opinions on the presentations. Each of us had our own preconceptions, and almost every single one of us had one dish we stuck to religiously. I brought my wife, Liz (as if I'd leave her home), who could eat their Stroganoff every meal and only chooses this option. Also, there was my sister and brother-in-law, Trent and Suzanne, who occasionally eat at Noodles and have their one or two favorites as well. Finally, there was my sister-in-law Lori and my little brother Gail. Now Gail has been a selective eater for most of his life and in a normal situation, wouldn't even have Noodles and Company on his radar, so I was very interested on how he would respond to the food.
 So to begin the meal, we grabbed a drink and the new Coke Drink Dispenser. It's far beyond the typical 6 or 7 options you'd have anywhere else. I highly recommend it! Why? Well, it has all the standard Coca-Cola options... but you can add flavorings to all the old standards, try 14 different options of Powerade, 7 different Fantas, and flavored regular and light lemonades and a number of other drinks that you would not normally find on tap. All in all, there are over 120 options, so no matter what mood you're in, you can find something you'll love. It's a rare occasion when you can get a Vanilla Barq's or a Cherry Vanilla Caffeine Free Diet Coke, so we put the machine through all of it's paces. If you are a fanatic for one particular beverage, here's your chance to experiment. Try a flavoring, try mixing different options together in the same glass or just try something different altogether. And when it comes to the kids, you have a couple dozen more options than anywhere else. Most of the time, all you have is Sprite, lemonade, and maybe root beer. But now Sawyer can get his Powerade and Wyatt can get Orange, Raspberry, Strawberry or Grape Fanta, depending on the day.
By the way, all pictures below were taken at our table of the actual food we tasted. These are not stock photos. Thanks to Trent Bray of CamAutoMag.com for taking the great pictures of the food.
 The meals began to arrive, starting with the Asian fare. I immediately went to the Indonesian Peanut Saute, because I'm a heat freak and it's what I order almost every time. The combinations of heat from the thai chiles, the sour from the lime and the heartiness of the peanut sauce always satisfies my hunger. But the rest of the party really liked the other options.
The Japanese Pan Noodles were a definite change of pace, with the thicker udon noodles in a soy sauce reminiscent of teriyaki really agreeing with Annie and Lori. I really enjoyed the shitake mushrooms and the cilantro, which really gives the thicker noodles a light aftertaste.
 And then there was the surprise of this sub-set, the Bangkok Curry. It's a light curry that won't blast out your sinuses, mixed into a great coconut base and combined with perfectly cooked rice noodles. Everyone at the table had nothing but good comments about this dish. Even my little brother loved it and went back for seconds.
Next we moved onto the Mediterranean options on the menu. Now when you think Mediterranean, you think Italy. And if you think noodles and Italy, you normally think spaghetti and meatballs. Well, that was the one item we didn't have, and I'm very glad we didn't. Because the other options were steps ahead of the basic marinara
 The Penna Rosa was wonderful. It's a light red sauce, backed with a few spices and laced with cream, then blended together with fresh whole leaf spinach and mushrooms. The saltiness of the feta cheese and the Parmesan crusted chicken pulled the entire dish together.
The Pesto Cavatappi was good too, with its light pesto sauce and slight touch of wine. And the Whole Grain Tuscan Linguine was great and surprisingly light for a whole wheat pasta. Those noodles have a tendency to be extra chewy and can sit in your stomach like a lead weight, but the dish was just the perfect consistency.
 At this point, almost everyone sat back in their seats in an effort to let the food digest, but then came the American courses. First was the Mushroom Stroganoff, Liz's favorite. The basic egg noodles with beef, mushrooms and a cream sauce always makes her happy. Then there was the Wisconsin Mac and Cheese, but there was a twist. They served it with meatballs. Now normally you wouldn't think of that combination at all, who would? But it was REALLY good. It's so good, the meatballs are now the recommended protein for the Mac and Cheese.
 But, the most shocking meal was the Buttered Noodles. By definition, you would think this would be the plainest meal of the day. I mean, what would it be beyond noodles and... well... butter? But it was covered in an Italian herb blend and loads of Parmesan cheese. Just those two extra ingredients made such a large change that it became a table favorite.
Then, as we were all starting to hit the infamous food wall, the seasonal American options were presented. The Bacon, Mac and Cheeseburger was great with the crumbled meatballs and bacon sprinkles over the customary mac and cheese. The Chili Mac made Gail happy with the hearty chili and shredded cheese smothering the macaroni.
 But the overwhelming favorite of the entire day was the Truffle Mac. It's macaroni and cheese with loads of sauteed portabello mushrooms, Parmesan cheese and drizzled with infused truffle oil. It was amazing! The truffle oil just permeated every inch of the cheesiness and lingered in my mouth for a very long time. There were leftovers, only because of the sheer amount we had eaten up to that point. The Rochambeau fight over them was long and brutal.
 After sampling almost everything, and each of us now sporting our own food babies, we sat back and observed the carnage. There were a few leftovers, but we had demolished most of the plates. And as we re-examined all the wares, we evaluated our experience.
Liz now has a conundrum when she goes to Noodles and Company. She was a Mushroom Stroganoff devotee for years, and now she's going to have a problem selecting from at least half the menu. Lori and Annie found they liked the Bangkok Curry, something that they wouldn't normally ever order. And Lori, who won the battle for the Truffle Mac leftovers, will definitely be ordering that again. And Gail, the person who never would have thought of Noodles and Company as an option, is thinking about going there for lunch every so often.
And me... well, with all the options on the table, I never thought I would consider Buttered Noodles. But I will, along with about dozen menu items now that I know how delicious they are.
And we probably wouldn't have known how good everything is on the Noodles and Company menu if we didn't try it all.
The moral of the story is this. Sure, you may have a favorite meal at a restaurant, something you order religiously. But if you just stick to that one dish, you may be missing an entire world of opportunities. Yes, we had the luxury of trying everything at once, but the next time you go Noodles and Company (or another like it), look over the entire menu and try something a little different, a little adventurous. Go for that choice that may be a little outside your comfort zone. Sure, you may not like it, but all you are out is one small meal. On the other hand, you MAY just find that you love that new item more than your old standby and expand your eating horizons.
 And special thanks to Neichel Cook and her entire crew at the Draper, Utah location for the wonderful food and great service! We'll definitely see you again.
Now whenever I have a great experience, I like to share it with my loyal readers. So let's pass out some free Noodles and Company food to you all as part of our Christmas Giveaways! We've already announced that one reader will win a $20 Orson Gygi gift certificate, Well now two more readers will win a multipack of meals from Noodles and Company! So how do you win one of these packs of fabulous food?
1. If you are already a Facebook friend, congratulations, you're automatically entered into the contest.
2. If you're not a Facebook friend, become one by clicking on the new Like link at the top right area of the That Means We Get Pie Home Page, or log into Facebook, look for the That Means We Get Pie page and click Like at the top of the page. You'll then be a friend and be entered in the contest.
3. You get extra credit for referring new people to the site. If you convince them to become a Facebook friend, have them e-mail ThatMeansWeGetPie@gmail.com and state that you referred them. They'll get an extra entry and so will you! Refer as many people you like and have them e-mail us, there's no limit to the number of entries you can earn.
Well be drawing for winners on December 23rd. So enter today and experience some of the great food I did at Noodles and Company!
At this tasting, we'd be trying almost everything on the menu. And since there would be a large volume of food, I brought along a posse.. well maybe not a posse, it's hard for me to roll like Jay-Z and very few want to roll like Kanye. But I did want a wide variety of opinions on the presentations. Each of us had our own preconceptions, and almost every single one of us had one dish we stuck to religiously. I brought my wife, Liz (as if I'd leave her home), who could eat their Stroganoff every meal and only chooses this option. Also, there was my sister and brother-in-law, Trent and Suzanne, who occasionally eat at Noodles and have their one or two favorites as well. Finally, there was my sister-in-law Lori and my little brother Gail. Now Gail has been a selective eater for most of his life and in a normal situation, wouldn't even have Noodles and Company on his radar, so I was very interested on how he would respond to the food.
By the way, all pictures below were taken at our table of the actual food we tasted. These are not stock photos. Thanks to Trent Bray of CamAutoMag.com for taking the great pictures of the food.

The Japanese Pan Noodles were a definite change of pace, with the thicker udon noodles in a soy sauce reminiscent of teriyaki really agreeing with Annie and Lori. I really enjoyed the shitake mushrooms and the cilantro, which really gives the thicker noodles a light aftertaste.

Next we moved onto the Mediterranean options on the menu. Now when you think Mediterranean, you think Italy. And if you think noodles and Italy, you normally think spaghetti and meatballs. Well, that was the one item we didn't have, and I'm very glad we didn't. Because the other options were steps ahead of the basic marinara

The Pesto Cavatappi was good too, with its light pesto sauce and slight touch of wine. And the Whole Grain Tuscan Linguine was great and surprisingly light for a whole wheat pasta. Those noodles have a tendency to be extra chewy and can sit in your stomach like a lead weight, but the dish was just the perfect consistency.


Then, as we were all starting to hit the infamous food wall, the seasonal American options were presented. The Bacon, Mac and Cheeseburger was great with the crumbled meatballs and bacon sprinkles over the customary mac and cheese. The Chili Mac made Gail happy with the hearty chili and shredded cheese smothering the macaroni.


Liz now has a conundrum when she goes to Noodles and Company. She was a Mushroom Stroganoff devotee for years, and now she's going to have a problem selecting from at least half the menu. Lori and Annie found they liked the Bangkok Curry, something that they wouldn't normally ever order. And Lori, who won the battle for the Truffle Mac leftovers, will definitely be ordering that again. And Gail, the person who never would have thought of Noodles and Company as an option, is thinking about going there for lunch every so often.
And me... well, with all the options on the table, I never thought I would consider Buttered Noodles. But I will, along with about dozen menu items now that I know how delicious they are.
And we probably wouldn't have known how good everything is on the Noodles and Company menu if we didn't try it all.
The moral of the story is this. Sure, you may have a favorite meal at a restaurant, something you order religiously. But if you just stick to that one dish, you may be missing an entire world of opportunities. Yes, we had the luxury of trying everything at once, but the next time you go Noodles and Company (or another like it), look over the entire menu and try something a little different, a little adventurous. Go for that choice that may be a little outside your comfort zone. Sure, you may not like it, but all you are out is one small meal. On the other hand, you MAY just find that you love that new item more than your old standby and expand your eating horizons.

Now whenever I have a great experience, I like to share it with my loyal readers. So let's pass out some free Noodles and Company food to you all as part of our Christmas Giveaways! We've already announced that one reader will win a $20 Orson Gygi gift certificate, Well now two more readers will win a multipack of meals from Noodles and Company! So how do you win one of these packs of fabulous food?
1. If you are already a Facebook friend, congratulations, you're automatically entered into the contest.
2. If you're not a Facebook friend, become one by clicking on the new Like link at the top right area of the That Means We Get Pie Home Page, or log into Facebook, look for the That Means We Get Pie page and click Like at the top of the page. You'll then be a friend and be entered in the contest.
3. You get extra credit for referring new people to the site. If you convince them to become a Facebook friend, have them e-mail ThatMeansWeGetPie@gmail.com and state that you referred them. They'll get an extra entry and so will you! Refer as many people you like and have them e-mail us, there's no limit to the number of entries you can earn.
Well be drawing for winners on December 23rd. So enter today and experience some of the great food I did at Noodles and Company!
Monday, December 12, 2011
Holiday Sugar Cookies... get ready for Santa!

And I happen to know that Santa likes cookies. Lots of cookies. Sugar-emblazoned, vanilla-rich, frosting-slathered cookies. None of these Chips Ahoy, or Sandies, or any other store-made "Dirt" cookies. No, Santa needs the good stuff. And if he's going to bring you that 6-disc Star Wars Blu-ray set or Cooking for Geeks in Hardcover (just in case you wanted to send me something, never hurts to ask), doesn't he deserve to get delicious sugar bombs? He needs all the calories he can consume if he's going to visit a billion households in one night.
This recipe works extremely well and it's a great "Weekend before Christmas" activity for the kids. And you can choose to decorate them any way you want. Once again, instead of buying big bags of candy to decorate the cookies, find a grocery store with a very good bulk section (like Winco) and buy a small amount of a multitudes of different candies. It gives the kids a wade variety of options and you'll be pleasantly surprised at their creativity. The picture above uses the cinnamon imperials and miniature M&Ms.
Holiday Sugar Cookies
Makes 18-24
1 cup sugar
So make a batch of these, show your appreciation to Santa, and maybe... just maybe... he'll leave you an extra gift or two.
1 cup softened butter
1 egg
1 tablespoon milk
3 cups flour
1 1/4 teaspoons baking powder
1/2 teaspoon salt
1 teaspoon vanilla
Pull out your mixing bowl and set up the paddle attachment. Add the sugar and butter and beat them for 3 minutes. Add the egg and the milk to the bowl and continue to beat it for another 5 minutes. While the mixer is running, combine the flour, baking powder and the salt. Next, turn the mixer to low and slowly add the flour mixture to the wet ingredients. Mix on a low setting until the flour mixture is well incorporated. Remove the dough, wrap in plastic wrap and refrigerate for at least an hour.
When you're ready to make the cookies,preheat the over to 350 degrees. Prepare the rolling surface by sprinkling it with powdered sugar instead of flour. The cornstarch in the powdered sugar will prevent the dough from sticking to the counter. Roll the dough out until it is 1/4 inch thick. Cut out any shape you want and use a spatula to transfer them to a cookie sheet. Recombine the leftover dough, roll it out again and cut out more cookies. Cook them one sheet at a time for 12-14 minutes, checking them at 10 minutes.
Cookie Frosting
1 1/2 cups powdered sugar
3 tablespoons softened butter or shortening, your preference
1 teaspoon vanilla extract
1 tablespoon milk
Food coloring
Combine the powdered sugar, butter, and vanilla in a mixer and beat until thoroughly combined. Add the milk and then mix again. Add more milk or more powdered until reaches the right consistency. Finally, slowly add the food coloring until you reach the desired hue. Spread on cookies and decorate any way you'd like.
So make a batch of these, show your appreciation to Santa, and maybe... just maybe... he'll leave you an extra gift or two.
Thursday, December 8, 2011
Gingerbread cookies

We've made a batch or two in the past to use as decorations on the Christmas tree. And of course they didn't stay intact all the way to Christmas Day. Having small children running around the house means that any type of candy or cookie left unguarded is fair game. It was a horrific sight. Cookie arms and legs torn off at random, gingerbread bodies broken in half... Even entire missing bodies, leaving the separated heads dangling from the decorative ribbon.
But Sawyer's older and I think we can convince Wyatt to leave them alone long enough. So we'll try it again, but in the meantime, we'll also make another batch to give away to the neighbors.
The recipe is very similar to any other cookie recipe. Just remember to work with the wet ingredients and sugars first, then move onto the dry ingredients. If you wish to use them as ornaments for your tree, I've found that it you use a straw to poke a hole through the cookie near the top of the head before baking, you have a perfect place to loop some ribbon. Just thread it through, tie it off, and then hang from the tree without a problem.
Gingerbread Cookies / Gingerbread Men
Makes 12 large, 24 small1 stick butter, preferably at room temperature
1/4 cup butter flavored shortening
3/4 cup brown sugar
1/2 cup molasses
1 egg
3 cups flour
1 1/2 teaspoons baking powder
2 teaspoons cinnamon
2 teaspoons ginger
1/2 teaspoon cloves
1/2 teaspoon salt
Place the butter, shortening and brown sugar in a large mixer. Start on low until slightly incorporated, then crank it up to high for two minutes. Add the egg and molasses and mix on medium high for 1 one minute.
In a separate bowl, add the flour, spices and salt into a bowl and mix well. Slowly mix the dry ingredients into the wet ingredients, adding about 1/4 of the dry ingredients each time. Mix for 30 seconds once everything is combined. Remove from the mixing bowl, wrap in plastic wrap and chill in the fridge for at least an hour.
Prepare you counter by liberally applying flour. Remove the dough from the fridge and place half of it on the prepared surface. Roll out the dough until it's between 1/8-1/4 inch thick, your preference. Use your cookie cutters to make as many cookies as the space will allow. Pull away the scraps and place the cookies onto an ungreased cookie sheet. Then combine all the scraps, roll out again and continue to cut out cookies. When you don't have enough for another cookie, add those scraps to the other half of the dough and repeat. Cook the cookies in a 350 degree oven for 10-13 minutes. Allow the cookies to cool before you try to add any frosting.
Once the cookies are completely cooled, you can move onto the frosting.
Frosting
2 cups powdered sugar
4 tablespoons butter
3 tablespoons milk
1 teaspoon vanilla
Add all of the ingredients to a large mixer and turn on LOW SPEED. DO NOT crank it up to high immediately, or if you are cooking with your kids, allow them to crank it up to high, lest you end up like this, covered in powdered sugar.

So make a batch or two, hang them from the tree and see how many are left on Christmas Morning.
Monday, December 5, 2011
Chocolate Caramel Pretzel Sticks

There is something magical about these bits of candy goodness. Very few tastes are as great as this combination of sweet and salty, smooth and crunchy. Make a bunch and give away a plate of them... or do what I did last year. I made a batch of them, wrapped up a single pretzel and tied it to the box of chocolates that I made.
While they take a little bit of time to create, they are not that hard to make. And you can put your tempering skills to work that we learned from the Peanut Butter Truffles. My recommendation is to buy your ingredients in bulk. There are some large kitchen stores and restaurant supply stores that will have everything you need. Here in Salt Lake, Orson Gygi sells some great chocolate and wonderful caramel at a pretty decent price. A five pound brick of the caramel is around $16.99. And they have a large variety of chocolates with a wide variety of prices, so you can get whatever you prefer. They also sell small cellophane bags and candy boxes, so if you want make an elaborate gift out if it, you can pick up those supplies while you're there.
Now if you don't have a good culinary store around, I still recommend buying in bulk if possible. Winco does have some good chocolate chunks in their bulk section that taste pretty good. And you can also find caramels there as well.
Chocolate and Caramel Covered Pretzel Sticks
Makes 80 pretzel sticks
5 pounds chocolate
5 pounds caramel
90 pretzel sticks (you're going to have a few break, it's just the way it is)
Other decorative colored chocolate, sprinkles, nuts, coconut or sugar
Cover 3-4 cookie sheets with parchment paper.
Place a 1/2 pound of caramel, chopped into 1 inch squares or less into a plastic tumbler. Place in the microwave and cook on high for one minute. Watch the caramel to make sure it doesn't boil over or scorch. Remove from the heat and stir to make sure there are no unmelted portions. If there are, return to the microwave and cook for 20-30 second intervals. Once it's melted, retrieve the pretzel sticks. Holding the glass of caramel at a 30-45 degree angle, dip a pretzel stick in the caramel and spin it against the edge, ensuring an even coating. Remove it from the caramel and place it on the parchment paper. Repeat with the other pretzel sticks until they are all coated. If you begin to run out of caramel or if it becomes too thick, add some more caramel cubes and return to the microwave to warm it. Allow to cool, for anywhere between 1-3 hours, until the caramel has firmed up completely.
In a chocolate melter or a double boiler, begin melting 1-2 pounds of chocolate. Heat the chocolate to above 115 degrees, then allow it to cool down to 93 degrees, maintain the temperature of the chocolate between 86 and 93 degrees. If it drops below 84, heat it back above 115 and then bring the temperature back down again. Once it's tempered, take one caramel pretzel stick and hold it over the chocolate. Spoon the tempered chocolate over all of the caramelled area and then return to the parchment paper. Repeat with all the sticks. If you run out of chocolate, add more, heat up to 115, and reduce to 93 or less again. I like to do a tray or two at a time and then decorate, just so the chocolate doesn't harden to the point where the decorations don't adhere.

Set the pretzels in a cool area for at least an hour. Don't store it somewhere too cold, like a fridge, garage in winter, etc., or you'll get white streaks or spots (called "Blooming") on your chocolate. This doesn't hurt its taste or edibility, it's just ruins that shiny exterior you worked so hard to achieve through the tempering process. When you're ready to hand them out, package them any way you'd like. Wrap them in individual sacks, place a bunch on a plate, lay them in a candy box, etc..
So make a batch and give them away, if you want. Or just hoard them and devour them like a crazed madman until you reach the sugar coma stage.... whatever makes you happy.
Subscribe to:
Comments (Atom)